
Did you know that over 60% of pet owners feel their furry friend’s crate disrupts their home’s aesthetic? This common dilemma pits a pet’s need for a secure space against an owner’s desire for a beautiful home.
You no longer have to choose between style and your companion’s comfort. This guide reveals how to build a stunning piece that serves a dual purpose. It cleverly conceals a cozy den within a chic end table.
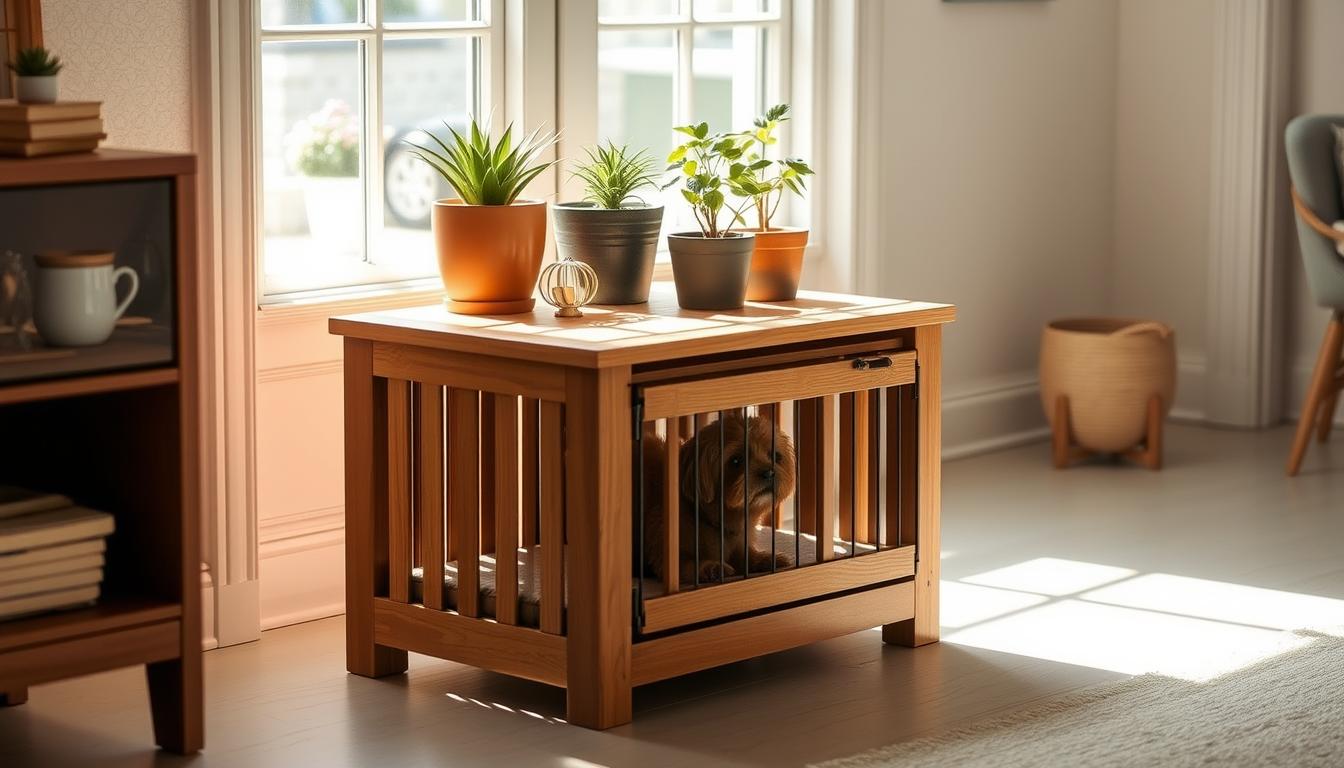
Imagine a beautiful addition to your living room that also provides a safe retreat for your canine. This project eliminates the need for unsightly wire crates. You can create a haven that blends perfectly with your existing decor.
Using simple materials from your local hardware store, you can complete this build for under $100. The process teaches essential woodworking skills. You will achieve a professional-looking result that rivals expensive store-bought options.
Key Takeaways
- Create a dual-purpose piece that enhances your home’s style while providing a secure space for your pet.
- Eliminate the visual intrusion of a standard wire crate with a design that integrates into your furniture.
- Complete the project affordably using readily available materials, potentially for less than $100.
- Learn fundamental construction techniques for measuring, cutting, and assembling a sturdy piece.
- Offer your companion a comfortable and familiar retreat during stressful situations like thunderstorms or visits from guests.
- Customize the finish to match your existing decor for a seamless look.
- Gain the satisfaction of building a high-quality, functional item with your own hands.
Introduction: Transform Your Home with a DIY Project
Creating a cohesive look in your home while accommodating your companion’s needs requires thoughtful planning. Many pet owners face the challenge of integrating practical solutions into their living environment without compromising style.
Understanding the Vision Behind Functional Furniture for Pets
The concept behind multi-purpose pet furniture addresses a common dilemma. Traditional enclosures often disrupt your carefully arranged decor. This innovative approach combines practicality with aesthetic appeal.
Consider Sturgill’s story—a rescue who found comfort in a designated safe area. His anxiety decreased significantly when provided with a proper retreat. The covered corner placement proved ideal for peaceful rest.
Why a Combination Dog Crate and Side Table Works Perfectly for Your Space
This dual-purpose solution maximizes functionality in your living area. It provides your companion with security while offering valuable surface space. The design naturally appeals to canine instincts for den-like environments.
Like Louie’s owners discovered, strategic placement keeps pets near family activities. They can retreat when feeling overwhelmed yet remain socially connected. The top surface conveniently stores essentials and decorative items.
This approach transforms utilitarian items into attractive pieces that blend seamlessly. Guests may not even recognize the enclosure’s true purpose. You achieve both beautiful decor and your pet’s well-being.
DIY Side Table Dog Crate: Functional Furniture For Pets
This hands-on undertaking presents an opportunity to develop valuable skills while producing a piece that perfectly matches your living space and pet’s requirements. You’ll combine practical woodworking techniques with creative design thinking throughout this rewarding project.

Whether you’re new to construction or have experience, this build offers appropriate challenges. Beginners can start with straightforward plywood designs using pocket holes. More advanced crafters might explore solid lumber with decorative elements.
The flexibility of this approach means you can scale dimensions for any companion. Small terriers and large retrievers alike will enjoy adequate space. You maintain complete control over material quality and construction methods.
Personal touches like custom stains and unique hardware make the piece truly yours. Consider adding viewing windows or extra storage features. These enhancements boost both functionality and visual appeal.
Beyond creating practical furniture, you’re building a special sanctuary. Your animal will associate this space with comfort and security. The finished product strengthens your bond through thoughtful environmental design.
Planning Your Project: Design and Measurements
The success of your build begins with accurate dimensions that accommodate both your pet’s needs and your room’s layout. Proper planning prevents material waste and ensures your creation fits perfectly.
Assessing Your Space and Setting Practical Dimensions
Start by measuring your companion’s current enclosure or taking direct body measurements. Record length from nose to tail base, shoulder width, and standing height. These numbers determine the interior space requirements.
Consider your room’s available floor area and adjacent furniture heights. Position the top surface slightly below couch armrests for convenient drink placement. This creates functional harmony with existing pieces.
| Component | Standard Wire Crate Basis | Custom Build Approach |
|---|---|---|
| Table Top Length | Crate length + 2 inches | 30 inches total |
| Table Top Width | Crate width + 4 inches | 20 inches total |
| Leg Height | Crate height + 2 inches | 24 inches total |
| Overall Height | 26 inches | 24 inches |

Sketching a Blueprint for Success
Create a detailed drawing with precise measurements before cutting materials. This visualization step helps identify potential issues with wall thickness and viewing window placement.
Verify that interior space exceeds your companion’s current accommodation. Ensure door mechanisms have proper clearance for smooth operation. Your blueprint becomes the roadmap to a successful build.
Gathering Materials & Tools for Your DIY Build
Smart sourcing decisions for your construction elements can transform an expensive project into an affordable one. Proper preparation ensures you have everything needed before starting assembly.
Essential Wood, Screws, and Glue
Your material selection depends on your design approach. Plywood builds require a 4’x8′ sheet, while solid lumber needs 2x4s for framing and 1x12s for panels.
Quality fasteners are crucial for structural integrity. You’ll need various wood screws, corner braces for reinforcement, and steel hanger straps. Wood glue creates bonds stronger than the wood itself when applied correctly.
| Material Type | Plywood Approach | Solid Lumber Build | Budget-Friendly Option |
|---|---|---|---|
| Primary Wood | 4’x8′ sheet (⅔ used) | 2x4s, 1x4s, 1x12s | Salvaged cabinet doors |
| Fasteners | Pocket hole screws | #6 x ½” wood screws | Corner braces |
| Adhesives | Wood glue + filler | Wood glue + conditioner | Basic wood glue |

Using Upcycled Items and Budget-Friendly Supplies
Strategic shopping keeps costs under $100. Habitat for Humanity ReStore offers cabinet doors for as little as $8. Farm supply stores sell damaged horse fence panels affordably.
Your tool collection should include measuring tape, circular saw, and power drill. Borrow specialized equipment like nail guns or routers to reduce expenses. This approach maximizes value without sacrificing quality.
Finishing materials like stain and polyurethane complete your project. Felt pads protect floors while decorative hardware adds personality. These final touches ensure professional results.
Step-by-Step Guide: Building the Table Top and Crate
The construction phase begins with creating the foundation of your piece—the table surface. This critical step determines both the aesthetic appeal and structural integrity of your finished project.

Cutting, Sanding, and Preparing the Wood
Your first step involves precise cutting of materials. Whether using cabinet doors or plywood sheets, always apply painter’s tape along cut lines to prevent splintering.
Measurements must be verified multiple times before cutting. One builder successfully joined cabinet doors by cutting 4½ inches from each edge. This created the proper width for their design.
Sanding follows immediately after cutting. Use medium-grit sandpaper (120-150 grit) followed by fine-grit (220 grit) for smooth edges. This preparation ensures professional results.
Assembling the Table Top with Secure Joint Techniques
Assembly requires careful alignment of pieces. Place cabinet doors face-down with cut edges precisely matched. Secure them using scrap wood strips screwed to the underside.
Always drill pilot holes with an 8/32 bit before inserting screws. This prevents wood splitting. Ensure screws are shorter than the combined thickness of both pieces.
Finishing individual components before assembly simplifies the process. Apply wood conditioner to porous woods before staining. One builder achieved excellent coverage using just 8 ounces of dark walnut stain applied with an old sock.
- Measure twice, cut once remains the golden rule for avoiding material waste
- Edge banding or veneer tape creates professional-looking results on plywood edges
- Allow stained pieces to dry completely before proceeding to assembly steps
Constructing the Crate Framework and Support
Precision cutting and careful assembly techniques transform individual lumber pieces into a sturdy framework that will support the entire structure. This phase determines the overall stability and professional appearance of your finished project.

Building and Aligning the Base and Posts
Begin with the base frame as your foundation. Use 2×4 lumber cut with 45-degree mitered corners for professional joints. Proper alignment at this stage prevents issues later.
Apply wood glue to all joints before fastening. This creates bonds stronger than the wood itself. Ensure your base sits perfectly square on the floor.
| Construction Method | 45-Degree Miter | 15-Degree Taper | Standard Flat |
|---|---|---|---|
| Primary Material | 2×4 lumber | 1×4 boards | Plywood sheets |
| Joint Strength | Excellent | Very Good | Good |
| Assembly Complexity | Moderate | High | Low |
| Weight Reduction | Significant | Maximum | Minimal |
Angled posts made from 1x4s reduce weight while maximizing interior space. This approach requires extra hands during assembly. Recruit assistance to hold pieces in position.
“The difference between amateur and professional work often comes down to foundation quality. A square base makes every subsequent step easier.”
Install internal support pieces along a level line drawn inside the base. Use saved scrap wood for these supports. Drop in your floor panel once the support system is complete.
Sand the entire frame while all surfaces remain accessible. This ensures smooth edges and eliminates rough spots before adding side panels.
Incorporating Additional Dog-Friendly Features
The final construction phase focuses on the entryway and visibility features that make the enclosure truly functional. These details ensure safe and comfortable use for your companion.
Proper installation is critical for security and ease of use. A well-built entry allows your animal to enter and exit without difficulty.
Installing the Door and Enhancing Accessibility
Begin by framing the top of the opening. Measure from the bottom upwards for accurate dimensions. This prevents a crooked appearance.
Cut your door panel smaller than the frame. Subtract 1/4 inch from both height and width. This creates the necessary 1/8-inch clearance on all sides.
Assemble the frame using wood glue and clamps for a strong, clean joint. Once set, attach your chosen panel material. A small stop block inside prevents the door from swinging inward and stressing the hinges.

Use scrap spacers while attaching hinges to maintain an even gap. Drill pilot holes for the screws to ensure a secure fit. A magnetic catch provides a simple, effective lock.
Add a leather pull or handle for easy access. When not needed, the door can hang on a screw at the back.
| Installation Method | Spacer Material | Hinge Type | Locking Style |
|---|---|---|---|
| Standard Gap | Plexiglass Scraps | Butt Hinge | Magnetic Catch |
| Guide Channel | Wood Shims | Piano Hinge | Barrel Bolt |
| Flush Mount | Cardboard | Concealed Hinge | Decorative Latch |
Adding Windows and Ventilation for Your Pet
Your companion needs fresh air and a view. Incorporate windows into the side or rear panels. Use materials like wire mesh or decorative metal.
This provides essential ventilation while keeping your animal safely inside. It also reduces any feeling of confinement, making the space more inviting.
Customizing Your DIY Dog Crate Side Table for Home Decor
Your final color selection and protective finish determine how well the piece integrates with your existing decor. This stage transforms basic construction into a polished addition to your living space.
Selecting a Stain or Paint to Complement Your Room
Choose your stain color by examining your current furniture and room design. Dark walnut stain works well across various interior styles. It hides minor imperfections better than lighter options.
Begin with proper wood conditioning when using pine or other softwoods. Apply conditioner liberally and let it penetrate for 15 minutes. Wipe off excess and apply your stain within an hour for even absorption.
Use inexpensive tools like old socks or t-shirt rags for application. Work the finish into the wood using circular motions. Wipe away excess following the grain direction.
Don’t neglect interior surfaces. Apply the same finish inside for complete protection. This guards against moisture and maintains a polished appearance from every angle.
Protect your stained surfaces with polyurethane topcoat. Apply two coats to sides and interior surfaces. The table top needs three coats minimum for durability.
Lightly sand between coats using 600-grit sandpaper. This creates a smooth surface for the next layer. The result is a professional-looking finish that enhances your room‘s aesthetic.
Time Management and Budget Tips for a Successful Project
Your approach to time and money management determines your project’s success and enjoyment. Many builders have completed this rewarding endeavor for under $100. They achieved this through smart planning and resourceful thinking.
Streamlined Steps to Save Time Without Sacrificing Quality
Break your work into manageable sessions rather than marathon builds. Complete cutting on one day, assembly on another, and finishing on a third weekend. This prevents fatigue-induced mistakes.
Your efficiency increases when you recruit help for tasks requiring extra hands. One builder collaborated with his wife and thanked friends Kristen and Emma Bean for their Saturday assistance. Transforming solo struggles into shared experiences makes the process more enjoyable.
Your tool expenses can drop to zero by borrowing equipment. Many builders used tools from awesome friends and neighbors rather than purchasing specialized items. Local hardware stores often make major cuts for free, saving significant time.
Your budget stretches further with strategic compromises. Consider these approaches:
- Shop at Habitat for Humanity ReStore for materials like cabinet doors ($8 for two)
- Use plywood instead of solid hardwood for substantial cost savings
- Join a monthly challenge with talented friends for motivation and shared problem-solving
Allow adequate drying time between steps. Rushing glue joints or finish coats leads to weak bonds and smeared surfaces. Proper timing ensures professional results without time-consuming repairs.
“Tackling this project with friends provides accountability and makes the work more enjoyable than solitary efforts.”
Your final cost remains low when you focus on function over complexity. Simple butt joints work well instead of intricate joinery. Painting rather than staining can also reduce expenses while still creating attractive results.
Conclusion
This dual-purpose solution transforms how you think about pet accommodations in your living space. As one builder shared, “I love having Sturgill’s crate integrated into our home.” The excitement builds from the start, with even young family members eagerly anticipating the finished piece.
Your completed project serves both practical and emotional needs. It provides your pet with a secure retreat while offering valuable surface area. This custom furniture blends seamlessly with your existing decor.
The dog crate becomes your companion’s favorite spot. Many animals voluntarily spend time in these spaces, even with the door open. This demonstrates how well-designed crate furniture meets their psychological needs.
Your successful diy accomplishment opens doors to future projects. The skills you’ve gained transfer to countless other woodworking endeavors. You’ve created a lasting piece that benefits your entire family for years to come.