
Over 400 billion LEGO pieces exist worldwide, but fewer than 1% find their way into functional home furnishings. This represents a massive untapped potential for creative home improvement.
Imagine transforming your living space with innovative furniture that combines practical utility with interactive play. These unique creations offer more than just surface area for drinks and decor.
Building custom furniture with integrated building brick surfaces provides dual benefits. You gain sophisticated home furnishings while creating engaging play spaces. This approach keeps children entertained for hours without compromising your interior design aesthetic.
The financial advantages are significant. Constructing your own piece typically costs between $70 and several hundred dollars. This compares favorably to purchasing specialty furniture retail. Your investment yields a conversation-starting centerpiece that reflects personal style.
These projects empower complete customization. You control dimensions, color schemes, storage configurations, and surface materials. The final product perfectly matches your home’s character while serving multiple practical purposes.
Key Takeaways
- Transform your living space with multi-functional furniture that combines style and play
- Create interactive surfaces that engage both children and adults simultaneously
- Save significant money compared to purchasing specialty retail furniture
- Customize every aspect to match your home’s specific decor and needs
- Build pieces that serve as conversation starters and family activity centers
- Develop practical storage solutions while maintaining aesthetic appeal
- Enjoy the satisfaction of creating unique, personalized home furnishings
Overview & Inspiration
Modern families increasingly seek furniture solutions that serve dual purposes without compromising aesthetics. This demand drives the innovative concept of integrating building surfaces into everyday home furnishings.

Your project likely originates from a practical need: containing construction pieces while providing dedicated space that doesn’t overwhelm your living area. The background stems from families wanting organized play areas that blend seamlessly with their decor.
Project Background and Creative Vision
Your creative approach can follow proven plans like Ana White’s “Mom’s Train Table” blueprint. This foundation offers reliable dimensions and construction methods adaptable for integrated building surfaces. The apothecary style trend provides additional inspiration, using simple wood pieces to create sophisticated drawer-front visuals.
You maintain flexibility in execution. Some creators transform existing pieces from retailers, while others build completely from scratch. Your choice depends on skill level and available time.
Inspiration from LEGO and Modern Living Room Designs
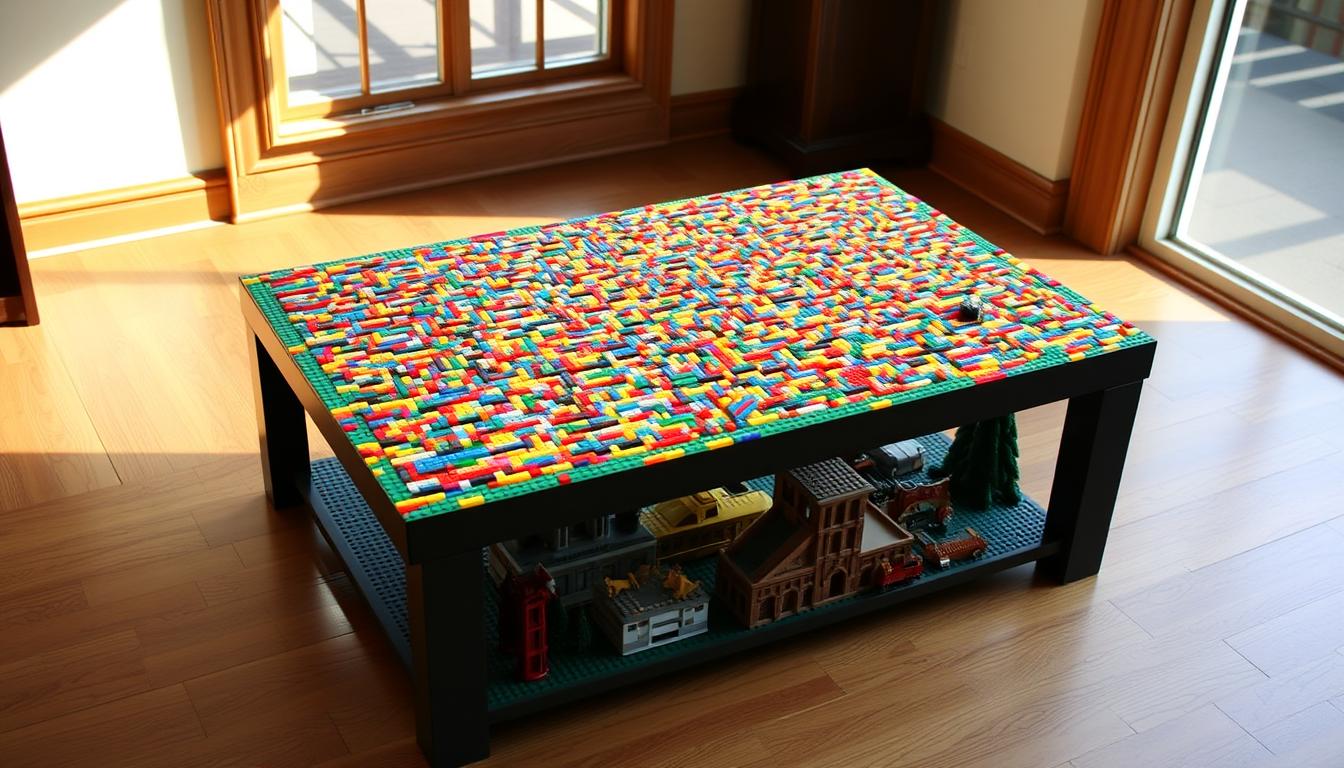
The most successful creations balance three essential elements. Structural stability ensures durability during active use. Ample storage accommodates extensive collections. Attractive finishing complements your room’s existing character.
This dual-purpose approach lets you present an elegant centerpiece that secretly contains interactive features. When designing your piece, consider both functional needs and decorative requirements. The final product should enhance rather than distract from your space’s overall look.
Discover more innovative furniture ideas that merge practicality with creative expression. Your vision can transform ordinary living spaces into engaging family hubs.
Planning and Materials for Your LEGO Coffee Table Project
Successful construction begins with thoughtful material selection and strategic planning. Your project’s longevity depends on choosing quality components that withstand daily use.

Essential LEGO Bricks, Wood, and Finishing Supplies
Start with sturdy plywood for your main structure. This wood provides excellent stability for the table surface.
Select 1×2 wood pieces for decorative trim. These add character while reinforcing the framework.
Purchase sufficient LEGO base plates to cover your building area. Consider color variety for different play themes.
Quality finishing materials ensure professional results. Use stainable wood filler for seamless holes.
Choose polyshades products that combine stain and protective finish. This saves time without sacrificing quality.
Tools and Techniques for a Professional Build
Essential tools include a drill for assembly and orbital sander for smooth surfaces. Proper equipment ensures precision.
Use Gorilla Glue Epoxy for securing LEGO plates. This adhesive withstands torque from frequent play.
Plan your storage configuration during material selection. Determine if you need internal shelf components.
Budget-friendly cabinet knobs provide visual impact. These hardware choices enhance the final appearance.
Apply wood conditioner before staining plywood. This step guarantees even color absorption.
Fun DIY Coffee Table Projects Built with LEGO Bricks: Step-by-Step Assembly
The assembly process transforms your materials into a functional and stylish centerpiece. You’ll follow a logical sequence that builds from the foundation upward.
Constructing the Table Base and Storage Elements
Begin with the framework using proven blueprints for exact dimensions. Your drill and driver set handles most structural connections.
Consider practical maintenance when designing the base. Omitting the bottom shelf allows easier vacuuming access. This becomes important when small pieces frequently drop during play.
Drill 1-inch holes in both ends of the removable top piece. This simple step makes storage access effortless. Without these holes, lifting becomes nearly impossible.
Attaching LEGO Plates with Precision
Trim base plates precisely to fit your surface dimensions. Use a razor blade for clean edges without gaps.
Your plate attachment requires a critical alignment technique. Snap actual building blocks between plates during gluing. This ensures proper spacing since plates won’t naturally sit flush.
Apply Gorilla Glue Epoxy in thin, even layers. This adhesive creates permanent bonds strong enough to withstand pulling forces.
| Assembly Phase | Estimated Time | Key Tools | Critical Steps |
|---|---|---|---|
| Base Construction | 2-3 hours | Drill, Driver Set | Follow blueprint dimensions exactly |
| Surface Preparation | 1 hour | Orbital Sander | Round all edges for safety |
| Plate Attachment | 45 minutes | Epoxy, Razor Blade | Use blocks for proper spacing |
| Finishing | 3-4 hours | Brushes, Rollers | Apply conditioner before stain |
Customizing with Paint, Stain, and Unique Details
Start your finishing process by filling visible screw holes. Use stainable wood filler for seamless results.
Apply stain to outer edges first. This strategy lets you cover accidental drips with paint later. Treat the top surface with wood conditioner before staining.
Your final customization creates the apothecary style aesthetic. Divide long sides into equal sections. Attach trim pieces as faux drawer fronts.
Install cabinet knobs centered on each section. This elevates your creation to furniture-store quality while maintaining its playful functionality.
Conclusion
Your journey through this guide has equipped you with the complete blueprint for a unique home furnishing. You have explored every part of the process, from initial design to the final touches.
Your completed project offers lasting value for your household. It provides a dedicated space for play that complements your room’s decor beautifully.
The skills you gained are applicable to future endeavors. You understand how different sections of a build combine for both function and style.
Use online video tutorials and image guides for visual confirmation as you work. This helps ensure your progress matches successful projects.
Your investment of time results in a distinctive piece for your house. It seamlessly blends adult living spaces with child-friendly entertainment.
You can feel confident in the durability and appeal of your final creation. It will serve as a cherished part of your home for years to come.