
Did you know that over 70% of American homeowners attempt at least one furniture-building project each year? Starting with a centerpiece like a coffee table offers the perfect entry point into woodworking. This accessible endeavor combines practical function with creative satisfaction.
Creating your own furniture piece represents one of the most rewarding accomplishments for newcomers. You gain complete control over the final product’s size, style, and finish. This approach often costs significantly less than store-bought alternatives while delivering custom results.
Our comprehensive guide walks you through essential concepts and techniques. You’ll find multiple design options suitable for various comfort levels and tool collections. Each idea transforms basic materials into stunning focal points for your living space.
By following these proven methods, you’ll develop practical skills that extend beyond this single endeavor. The manageable scale and straightforward construction make this an ideal starting point. You’ll create a functional piece that serves daily needs while building confidence for future undertakings.
Key Takeaways
- Building your own furniture saves money compared to retail options
- Customization allows perfect matching with your existing decor
- Multiple design options accommodate different skill levels
- Practical woodworking skills gained transfer to future projects
- Manageable size makes this an excellent starting point
- Immediate practical value in your living space
- Combines creative expression with functional purpose
Understanding the Basics of DIY Coffee Table Projects
The journey into furniture creation often begins with a simple yet impactful piece that serves as both functional surface and decorative anchor. This initial undertaking builds confidence while teaching fundamental techniques.
What Is a DIY Coffee Table?
A DIY coffee table represents a handcrafted furniture piece you construct personally. You work with accessible materials like wood, following either detailed plans or your own creative vision.

This particular furniture item becomes the living room’s central focus point. It provides practical utility while establishing your space’s aesthetic foundation.
Benefits for Beginners in Home Furniture Projects
Building your own coffee table demonstrates craftsmanship while offering significant cost savings. The project allows complete personalization of dimensions, style, and finish.
Your finished creation becomes a genuine conversation starter. It showcases dedication in a way mass-produced alternatives cannot match.
These manageable projects teach essential woodworking fundamentals. Skills like measuring, cutting, and assembly transfer to more complex future endeavors.
Planning Your Project and Design Options
The difference between an average result and exceptional furniture lies in the preliminary planning stages. Thoughtful preparation ensures your creation meets both aesthetic and functional requirements.
Adapting Measurements to Your Living Space
Begin by measuring your available living room area. Proper dimensions ensure proportional fit with existing furniture arrangements. The ideal size typically equals two-thirds of your sofa’s length.
Consider height carefully for comfort and utility. Standard measurements range from 16 to 18 inches to align with seating. Maintain 14 to 18 inches clearance around the table for easy movement.
Your design choices should reflect lifestyle needs. Options include rectangular, square, round, and hexagonal shapes. Each offers unique aesthetic and functional benefits for your room.
Storage features like shelves or compartments add practicality. Consider lower profiles for households with children or pets. Your coffee table should balance style with daily requirements.
Select from rustic, modern, or industrial styles to match your decor. The planning phase determines whether your piece serves indoor or outdoor space. This decision influences material selection and construction methods.
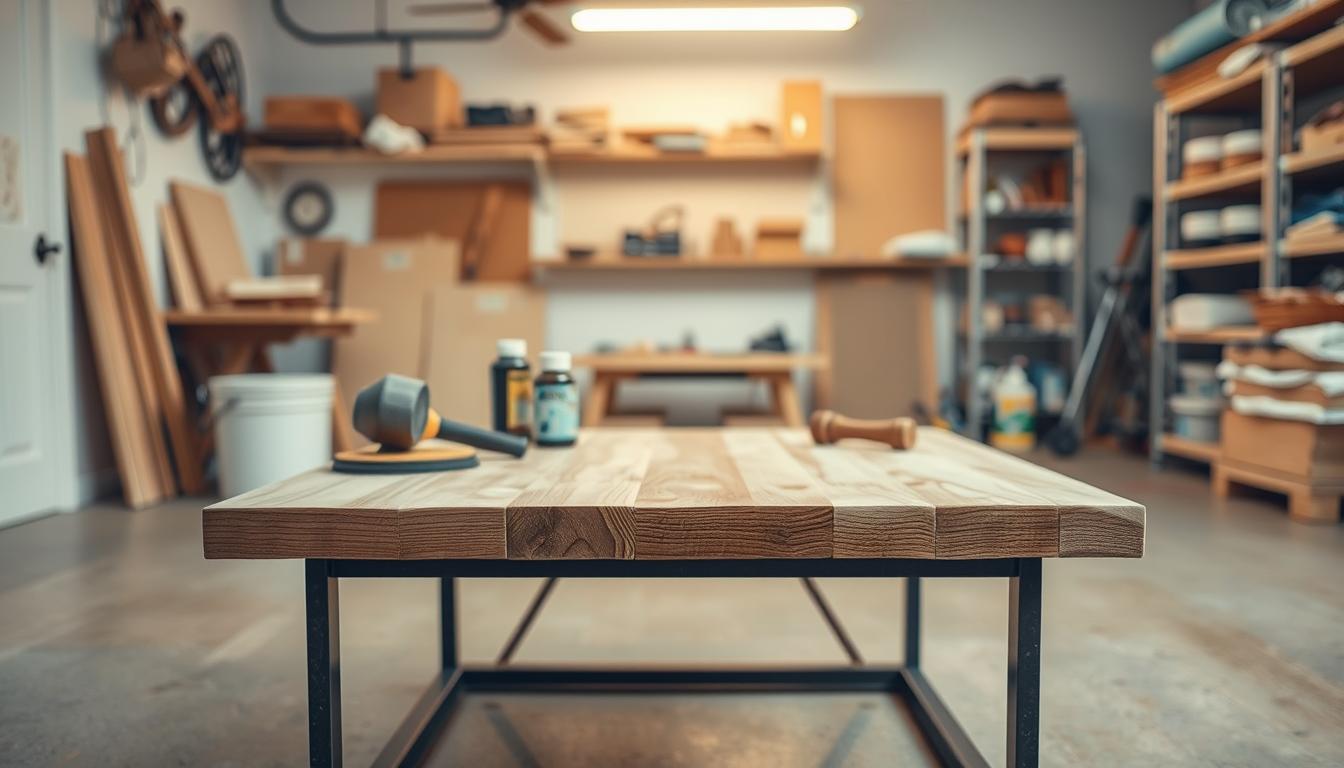
Gathering Quality Materials and Tools
Your material and tool selection directly influences both the construction process and the final quality of your furniture piece. Choosing the right components ensures a smoother build and a more durable result.

Selecting the Right Wood and Essential Tools
Pine boards offer an affordable and accessible option for your first project. This softwood is easy to work with, though it may show dents more easily than hardwoods.
For enhanced durability and a high-end look, consider hardwoods like oak or walnut. These wood species provide superior strength and a luxurious appearance.
Outdoor projects require weather-resistant wood such as cedar or teak. These types naturally withstand the elements without rapid deterioration.
Essential tools form the foundation of your workshop. You will need a saw for cutting boards, a drill for assembly, and a sander for finishing.
Wood glue is crucial for creating strong bonds between pieces. When combined with screws, it produces joints that last for years. Clamps are indispensable for holding everything together while the glue sets.
Specialty tools can elevate your build. A Kreg jig enables clean pocket-hole joinery, hiding fasteners for a professional look. A hand planer can add character through distressing.
- Circular saw or table saw
- Drill and assorted bits
- Orbital sander with various grits
- Bar clamps for secure glue-ups
- A level to ensure a flat surface
With these materials and tools assembled, you are ready to begin construction. Proper preparation sets the stage for a successful and enjoyable building experience.
Easy DIY Coffee Table Projects for Beginners: A Step-by-Step Process
Your project transitions from planning to reality during the cutting and assembly stages. This phase transforms individual boards into a cohesive furniture piece through systematic construction methods.

Cutting and Assembling the Tabletop
Begin by cutting your boards to the planned dimensions. For a standard rectangular design, you’ll need two longer boards for the surface and four shorter pieces for support structures.
An optional technique involves removing rounded edges from boards using a circular saw. This creates square edges that join together more seamlessly. The result appears more professional when pieces connect.
Assemble your surface by gluing and screwing the two main boards together. Fill any gaps with a mixture of sawdust and adhesive to create the appearance of a single, solid piece. This method ensures your surface remains stable and visually consistent.
Creating Sturdy Legs and a Solid Base
Construct each support element by gluing and screwing two pieces of wood together. This doubling technique provides thickness and stability for daily use. The added strength prevents wobbling and extends your furniture’s lifespan.
Use a Kreg jig to create pocket holes for attaching supports to the surface. This method conceals fasteners while maintaining structural integrity. The clean appearance enhances your final product’s professional look.
For circular designs with three supports, attach a small wood piece to each leg top. Position them using 120-degree spacing for balanced weight distribution. This configuration ensures stability across the entire surface area.
| Assembly Method | Best For | Tools Required | Strength Rating |
|---|---|---|---|
| Pocket Hole Joinery | Rectangular Tables | Kreg Jig, Drill | Excellent |
| Tri-Leg Configuration | Round Tables | Angle Finder, Clamps | Good |
| Direct Screw Attachment | Simple Designs | Drill, Wood Glue | Fair |
Following these instructions methodically prevents costly errors. Each phase builds logically toward your completed project. The process demonstrates fundamental woodworking principles that apply to future endeavors.
Customizing Your Coffee Table Design
Personalizing your creation transforms a functional piece into a reflection of your unique aesthetic vision and home environment. This stage allows you to infuse character that matches your living space perfectly.

Adding Rustic, Modern, or Vintage Finishes
Rustic styles create warmth through intentional distressing. Use hand planers to add grooves that enhance the wood’s character. These imperfections become highlights when you apply your chosen stain.
Modern design emphasizes clean lines and minimalist aesthetics. Consider pairing wood surfaces with black metal bases for contemporary appeal. The look should be sleek and uncluttered.
Vintage finishes replicate aged furniture through layered staining techniques. Build up multiple coats to create authentic patina. This approach gives your table a well-loved appearance.
Industrial styles incorporate raw materials like iron pipes. X-leg structures showcase material beauty while providing sturdy support. Exposed hardware becomes a design feature.
| Finish Style | Key Characteristics | Best For | Tools Needed |
|---|---|---|---|
| Rustic Farmhouse | Distressed surface, warm tones | Traditional decor | Hand planer, multi-tool |
| Modern Minimalist | Clean lines, contrasting elements | Contemporary spaces | Sander, precision tools |
| Vintage Inspired | Layered stains, weathered look | Character-filled rooms | Various brushes, stains |
| Industrial | Raw materials, exposed hardware | Urban lofts | Pipe cutter, wrench |
Your customization options extend beyond basic finishes. Consider functional additions like storage shelves or decorative patterns. Tile mosaics can create unique surface treatments.
Choose finishes that balance visual appeal with practical durability. Your selected treatment should protect the wood while enhancing its natural beauty. The right design ensures your piece withstands daily use.
Step-by-Step Construction and Assembly
The construction phase brings your vision to life through careful execution of each step. This process transforms individual components into a unified furniture item that combines strength with aesthetic appeal.
Tips for Accurate Measurements and Layout
Precision begins with measuring twice before cutting any material. Use a reliable tape measure and mark cut lines clearly with a pencil and square. This approach prevents costly errors in your building process.
When working with multiple boards, plan your layout considering wood grain direction. Position the most attractive side outward on visible surfaces. This attention to detail enhances your final product’s appearance.
For three-leg designs, locate the center point of your table base accurately. Use a protractor to mark precise 120-degree spacing between each support element. This balanced configuration ensures stable weight distribution.
Effective Use of Wood Glue, Screws, and Clamps
Combine mechanical fasteners with adhesive for superior joint strength. Apply a thin, even layer of wood glue on both surfaces being joined. Position clamps to apply even pressure across the entire connection.
Use protective wood scraps between clamp jaws and your workpiece to prevent surface damage. Countersunk screws placed through the middle of wood pieces create flush finishes. These fasteners sit below the surface when completed.
When attaching legs to the base, secure a small wood piece to each leg top first. Fasten that piece to the base with one screw on each side for stable four-point attachment. This method provides exceptional stability.
| Assembly Technique | Primary Benefit | Tools Required | Difficulty Level |
|---|---|---|---|
| Countersunk Screws | Flush surface finish | Drill, countersink bit | Beginner |
| 120-Degree Leg Spacing | Perfect weight distribution | Protractor, pencil | Intermediate |
| Glue and Clamp Method | Maximum joint strength | Clamps, wood glue | Beginner |
| Four-Point Attachment | Enhanced stability | Drill, screws | Intermediate |
Following detailed instructions at each construction stage prevents errors. Verify square alignment and level surfaces before proceeding. This systematic approach ensures professional results.
Finishing Techniques and Protective Coatings
The finishing stage transforms your raw construction into a polished furniture piece through careful surface treatment. This phase determines both the visual appeal and durability of your completed project.
Begin with thorough sanding using progressive grits. Start with 80-grit paper to remove imperfections, then progress to 120-grit and finish with 220-grit for an ultra-smooth surface. Random orbital sanders prevent circular scratch marks that might show through your final finish.
Distressing, Sanding, and Staining Methods
Distressing adds character through intentional imperfections. Use a hand planer and multi-tool to create divots and lines. Every mark enhances the rustic look after staining.
Gel stains offer beginner-friendly application because they sit on the wood surface. This minimizes blotchiness without requiring pre-stain conditioners. Liquid stains penetrate deeper but may need conditioners to prevent uneven absorption.
| Stain Type | Application Method | Best For | Drying Time |
|---|---|---|---|
| Gel Stain | Wipe-on, wipe-off | Beginner projects | 6-8 hours |
| Liquid Stain | Brush and wipe | Rich color saturation | 6-8 hours |
| Oil-Based | Penetrating application | Durable finishes | 8-10 hours |
| Water-Based | Quick-drying option | Indoor furniture | 2-4 hours |
Match conditioner type to your stain selection. Water-based conditioners raise wood grain and require light sanding after drying. Oil-based options eliminate this extra step.
Apply protective top coats after stains fully dry. Use thin layers of polyurethane or varnish for best results. This seals the surface against moisture and daily wear.
Proper disposal of stain-soaked rags is crucial for safety. Spread them flat to dry completely outdoors before disposal to prevent combustion risks.
Budgeting and Cost-Saving Tips
Financial planning plays a crucial role in making your woodworking aspirations accessible and sustainable. The right approach transforms expensive retail furniture into affordable custom creations.
You can achieve remarkable savings with strategic material choices. One project demonstrates this perfectly, costing only $67 compared to a $4,000 retail version.
Resourceful Material Sourcing and Tool Alternatives
Begin your search at local thrift stores and estate sales. These places often contain quality materials at fraction-of-retail prices.
Home improvement stores like Lowe’s and Home Depot offer standard lumber options. This option provides accessibility without compromising quality for your table.
Consider borrowing specialized tools instead of purchasing them. Many communities have tool libraries where you can access equipment for a limited time.
Simple designs require just a couple of hours to complete. This way, you can finish your coffee table during a weekend without major time commitment.
The end result proves that basic woodworking knowledge suffices for success. You don’t need years of experience to create beautiful tables.
With careful planning, your diy coffee table becomes an affordable achievement. The end product showcases both craftsmanship and financial wisdom.
Conclusion
Your completed furniture piece stands as a testament to both practical skill and personal creativity. This journey from raw materials to a finished coffee table equips you with foundational woodworking knowledge.
The techniques you mastered—from precise measurement to final finishing—apply directly to future furniture endeavors. Your new table offers exceptional value and a perfect fit for your living room.
This single project unlocks the potential for countless custom creations in your home. You have proven that with careful planning, quality builds are within reach.
Your custom coffee table now serves as a functional centerpiece and a point of pride. Let this accomplishment inspire your next design challenge.