
Did you know that thousands of car motors destined for scrap yards find new life as stunning furniture pieces each year? This creative trend gives automotive history a permanent place in your home.
Imagine transforming a mechanical relic into a functional work of art. Your living space can become a tribute to engineering brilliance. This project lets you showcase your passion in a truly unique way.
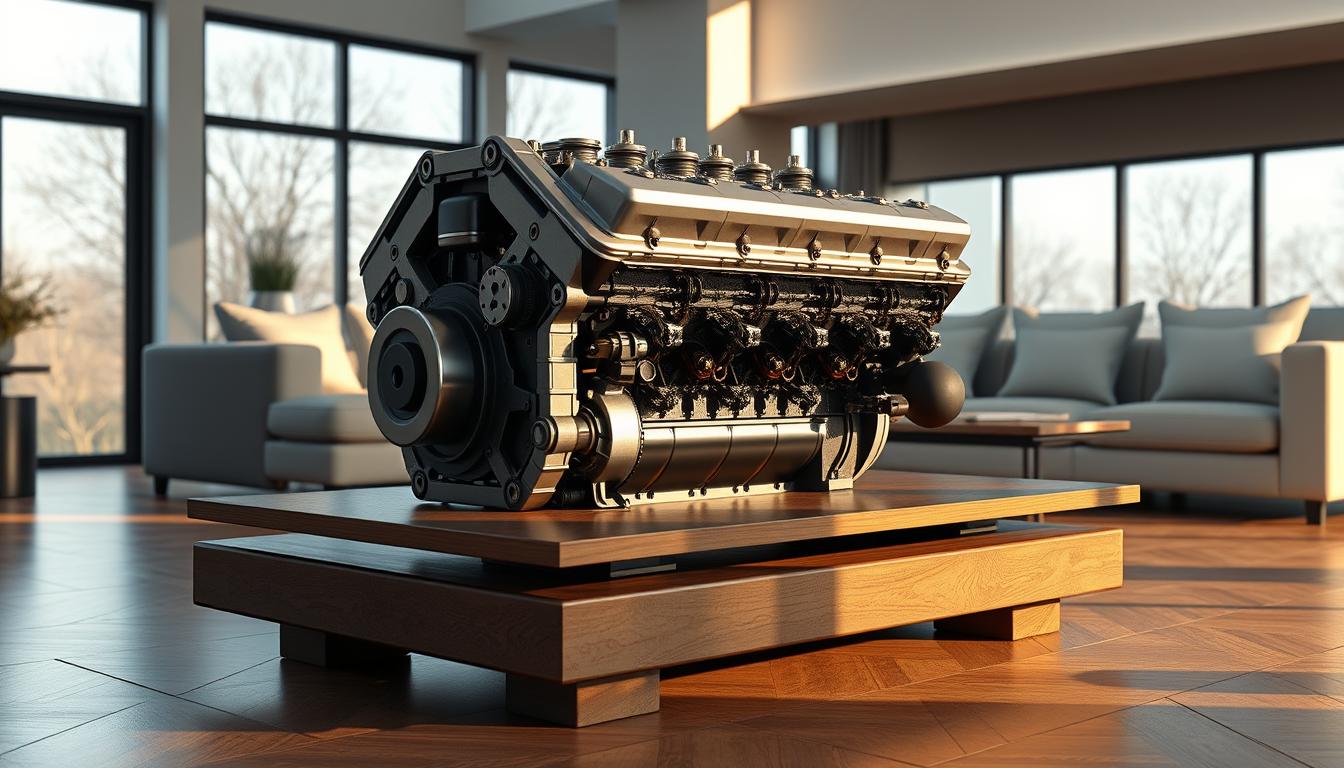
You can choose from various powerplants, like a classic Cadillac V8 or a Porsche motor. Each piece tells a different story. Your selection reflects your personal automotive tastes.
This endeavor combines craftsmanship with mechanical appreciation. The final product serves as an instant conversation starter. It proves that automotive passion extends far beyond the garage.
Key Takeaways
- Repurpose a discarded car motor into a unique furniture centerpiece.
- Select from various engine types to match your personal style.
- Create a functional work of art that celebrates automotive history.
- Showcase your technical skills and passion for mechanical design.
- Transform scrap metal into a conversation-starting piece for your home.
- Bring the beauty of automotive engineering into your living space.
Essential Tools, Materials, and Engine Selection
The foundation of any remarkable mechanical furniture project starts with careful preparation and material selection. Your success depends on choosing the right components and having proper equipment ready.

Identifying the Ideal Engine Block
Selecting the perfect powerplant forms the core of your project. Look for units with catastrophic internal failure but intact external features. This approach ensures you’re not taking parts from viable restoration projects.
Various engine types work wonderfully for this application. Compact four-cylinder blocks create subtle statements. Larger V8 units make bold centerpieces. The condition matters less than the visual appeal.
Scrap yards and online marketplaces offer excellent sourcing options. Enthusiast forums often have motors available at minimal cost. Your chosen block determines the final aesthetic of your creation.
Gathering Tools and Supplies
Proper equipment makes the transformation process smooth and efficient. Your toolkit should include degreasers to remove accumulated oil and grime. Wire wheels or drills help eliminate surface rust effectively.
Essential supplies include four pistons and corresponding bolts for mounting. These provide stable support for the glass surface. Cleaning agents like brake cleaner prepare the metal for finishing.
Primers and your desired paint color complete the material list. Having everything organized before starting prevents unnecessary delays. This preparation ensures a streamlined building experience.
DIY Engine Coffee Table: Auto Enthusiast’s Dream Build – Step-by-Step Guide
The journey from a greasy, used powerplant to a sleek centerpiece is a rewarding process of restoration and assembly. This guide walks you through each critical phase.
Careful execution during these steps ensures a professional-looking final product that will last for years.

Tear Down and Cleaning Process
Your first task is to strip the unit down to its bare block. This work requires patience more than advanced skill. You will likely find stubborn, rusted bolts.
Apply heat carefully to loosen them without breaking. Keep any parts you wish to feature on the finished piece.
Degreasing, Sandblasting, and Priming Techniques
Thoroughly degrease every surface to remove old oil and grime. For rust removal, a sandblaster is efficient. A drill with a wire wheel attachment also works well for detailed areas.
Priming is a crucial step. Use an etch primer first, followed by light coats of rust-inhibiting primer. This prevents future corrosion and ensures paint adhesion.
Reassembling Key Components for Aesthetic Appeal
Now, focus on the visual elements. Clean the pistons using aluminum foil and brake cleaner to avoid scratches. Attach them to the top of the block with bolts.
These bolts thread into the original cylinder head holes. This creates a stable platform for the glass top. Use anti-slip matting between the pistons and glass for safety.
Key steps for a flawless finish:
- Apply paint in several light coats to prevent drips.
- Add protective feet to the bottom of the block.
- Seal all bare metal with a clear coat.
This entire process demands dedicated time. The end result, however, is a unique and functional piece of art.
Advanced Tips and Customization Strategies
Creative modifications elevate your automotive-inspired furniture beyond basic functionality. These finishing touches transform your piece into a reflection of personal style.
Thoughtful customization makes each creation unique. Your choices demonstrate technical skill and artistic vision.
Custom Finishes and Paint Options
Your paint selection dramatically affects the final appearance. Classic engine colors create authentic automotive appeal. Bold custom hues make striking contemporary statements.
Consider the surrounding decor when choosing finishes. Metallic paints highlight mechanical details effectively. Clear coating protects your work for years.
Innovative Add-Ons and Personal Touches
LED lighting installations create dramatic visual effects. Strategic placement beneath the glass illuminates internal components. This addition enhances ambiance while showcasing craftsmanship.
Flipped bearing caps serve as adjustable feet for precise leveling. This clever solution maintains mechanical authenticity. Your build remains non-destructive to the original block.
Glass top options provide both safety and style:
| Type | Thickness | Appearance | Best Use |
|---|---|---|---|
| Tempered | 1/2 inch | Clear | High durability |
| Tinted | 3/8 inch | Smoke gray | Modern interiors |
| Laminated | 3/4 inch | Ultra-clear | Maximum visibility |
Polished components like camshafts add visual interest. These elements celebrate mechanical beauty without compromising function. Your personal touches make the piece truly one-of-a-kind.
The customization process allows one person to express creativity effectively. Your finished product reflects dedication and passion.
Conclusion
Your finished piece is more than a simple table; it’s a symbol of your dedication to craftsmanship and mechanical art. You have successfully preserved a piece of automotive history, giving it a new and purposeful life.
This project proves that with basic tools and determination, you can create professional-quality furniture. The skills you learned during this build are valuable for many future endeavors.
Your unique table serves as a constant reminder of what vision and effort can achieve. Perhaps this first project has inspired ideas for your next creation.