
Did you know the average American home receives over 100 packages a year? That’s a mountain of cardboard boxes. Instead of sending them straight to recycling, you can transform them into something amazing.
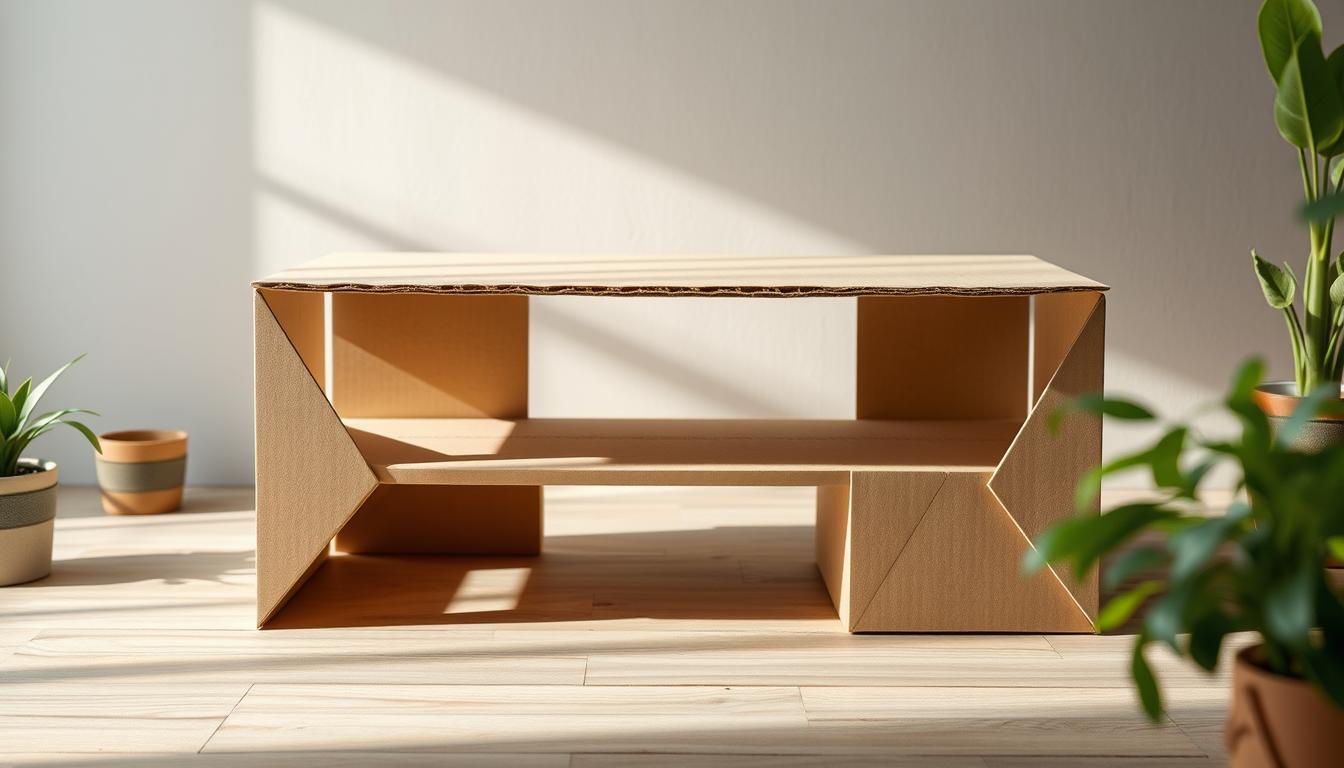
This guide shows you how to build a sturdy and stylish centerpiece for your living room. You will use materials you already have. The concept started by looking at Amazon boxes and seeing their hidden potential.
By layering cardboard with adhesive, it becomes remarkably strong. This method turns a weak material into a durable construction element. It proves that accessible home styling is possible for everyone.
You don’t need expensive tools or woodworking skills. This approach is budget-friendly and sustainable. It gives packaging a second life as beautiful, functional furniture.
We will walk you through the entire process. You’ll learn about material selection, construction techniques, and finishing methods. The result is a custom piece that fits your space and style perfectly.
Key Takeaways
- Repurpose common shipping boxes into a unique and functional furniture piece.
- Create a surprisingly strong build by properly layering and reinforcing the material.
- This approach is highly accessible, requiring no specialized tools or advanced skills.
- Significantly reduce costs by utilizing materials that are often discarded.
- Enjoy full customization over the final size, shape, and aesthetic of your creation.
- Contribute to environmental conservation by giving waste materials a new purpose.
- Learn step-by-step methods for construction, finishing, and styling your new table.
Project Overview and Inspiration
Many people dream of customizing their living area but feel held back by the perceived difficulty of furniture creation. This endeavor flips that script entirely. It empowers you to take control of your home’s aesthetic without needing professional skills or a large budget.
Understanding the DIY Concept
Traditional projects can seem daunting. They often require specialized tools and a significant time commitment. This approach removes those common barriers.
You utilize simple, accessible materials and straightforward techniques. The goal is mastery for anyone, regardless of their starting experience level. This philosophy opens up a world of creative potential.

Sustainable Design and Budget-Friendly Creativity
The core of this concept is smart resource use. You give new life to materials that are often discarded. This choice supports waste reduction and environmental conservation.
Financially, the benefits are just as compelling. You can create a custom piece for your home at a fraction of the cost of store-bought items. This makes high-impact design accessible.
The method is highly adaptable. It works perfectly in compact living areas where every piece must be both functional and stylish. You have full freedom to experiment with shapes and finishes.
| Method | Skill Level Required | Typical Cost | Customization Potential |
|---|---|---|---|
| Traditional Woodworking | Intermediate to Advanced | High | High (with advanced skills) |
| Store-Bought Furniture | None (Assembly Only) | Medium to High | Low |
| This Project Approach | Beginner | Very Low | Very High |
This versatile idea can be applied to various home areas beyond a single centerpiece. It proves that with a clever design idea, you can achieve remarkable results.
Gathering Materials and Tools
You can find most of what you need for this build already in your home or through simple, sustainable sourcing. Proper preparation with the right components sets the stage for a successful and enjoyable creation process.
Essential Supplies and Equipment
Your primary material is corrugated cardboard. Look for sturdy sheets from shipping boxes. This type offers superior strength when layered, unlike flimsy single-ply options.
For cutting, a sharp utility knife like the WORKPRO Premium model or heavy-duty scissors is essential. A metal ruler is crucial for straight cuts and accurate measuring. Plastic rulers can be damaged by the knife blade.

Adhesives are key. Use a low-odor construction adhesive, such as Gorilla Heavy Duty, to bond layers. Have PVA glue, like Elmer’s, on hand for sealing surfaces later.
Finishing requires ready-mixed patching plaster (DryDex is a good choice), a spreading knife, and a clear acrylic sealer spray. These materials create a durable, paintable surface.
Alternative Sources and Sustainable Options
Gather boxes from online deliveries or ask local retailers for discarded packaging. Saving smaller boxes over time is another effective strategy.
This approach minimizes waste and cost. For decorative tops, consider craft sticks or wallpaper. These optional items allow for full personalization of your final piece.
Using pre-mixed plaster saves time and ensures a consistent, easy-to-apply finish. Its resealable container also helps prevent waste for future creative endeavors.
Planning and Designing Your Coffee Table
Before cutting your first piece, careful planning ensures your creation will be both functional and visually appealing. This phase transforms your vision into a tangible blueprint for success.
Customizing Size, Shape, and Style
Start by measuring your available space. Consider how the piece will function in your room. Will it hold books, drinks, or decorative items?
Think beyond traditional rectangles. Geometric forms like triangular prisms offer modern appeal. Hexagonal designs create visual interest. Modified box structures can incorporate hidden storage.
Your design should account for structural needs. Plan for multiple layers of material to ensure durability. Larger surfaces require additional support.

Marking and Measuring Techniques
Use a metal ruler for precise measurements. Mark cutting lines clearly with a pencil. Account for material thickness at connection points.
Create templates for repeating shapes. This guide ensures consistency across all pieces. Proper marking prevents assembly issues later.
Plan your tabletop dimensions carefully. Consider how edges will join. Structural elements like support beams need precise planning.
This step establishes the foundation for your entire project. Accurate measurements lead to professional results.
Step-by-Step Assembly Process
The assembly phase transforms your flat cardboard pieces into a stable, three-dimensional structure. This is where your planning becomes a physical reality. Follow these steps carefully for a robust build.
Layering and Cutting the Cardboard
Begin by cutting all pieces with a utility knife and metal straightedge. Protect your work surface. Consistent pressure ensures clean edges.
Create multiple identical layers for each face. This technique builds remarkable strength from single sheets. Proper alignment is crucial for structural integrity.
Securing the Structure with Adhesives
Apply a solvent-free construction glue evenly across surfaces. Use the sandwich method to bond layers. Gentle pressure spreads adhesive without crushing the material.
Allow proper drying time before handling. This prevents bonds from weakening. Create internal support tabs from folded cardboard rectangles.
Attach these tabs to connect individual faces. They provide essential support at the joints. Fill any gaps with more adhesive for a seamless finish.
| Adhesive Type | Best Use Case | Drying Time |
|---|---|---|
| Low-Odor Construction Adhesive | Primary layer bonding | 24 hours for full cure |
| PVA Craft Glue | Sealing surfaces | 30-60 minutes |
| Hot Glue Gun | Quick temporary holds | Seconds to set |
For the legs, shape cardboard tubes to fit into corners. A snug fit ensures stability. Check for wobbles and reinforce any weak points. Your structure is now ready for finishing.
Applying Finishing Touches
The final phase of your project transforms the raw structure into a polished piece of furniture. These finishing steps ensure durability and create the aesthetic you desire. Proper technique makes all the difference in the final result.

Plaster Application and Surface Smoothing
Begin by sealing your assembled creation with diluted PVA glue. This primer creates a protective barrier and prepares the surface. Ready-mixed plaster offers consistency without mixing complications.
Apply thin layers using a spreading tool. Work on one section at a time, allowing each to dry completely. This method prevents cracking and ensures smooth transitions between surfaces.
Build up edges gradually rather than attempting all sides simultaneously. Multiple thin coats provide better results than one thick application. This approach prevents structural issues and delamination.
Sealing, Sanding, and Enhancing Durability
After plaster dries, sand with medium pressure to refine the surface. You can achieve either a smooth modern finish or textured rustic look. Always work in a well-ventilated area when sanding.
The critical final step involves applying a clear sealant spray. This product protects against moisture, spills, and daily wear. It transforms the porous surface into a durable, cleanable finish.
Alternative finishing options include wallpaper covering or creative stick arrangements. These personalization choices let you customize the appearance to match your decor. Troubleshoot any uneven areas with additional thin coats.
Eco-Friendly DIY Coffee Table Ideas Using Cardboard: Tips and Techniques
Advanced techniques can transform your basic creation into a multi-purpose piece that serves dual functions. This approach maximizes the utility of your furniture while maintaining its structural integrity.
Creative Adaptations and Storage Solutions
Incorporate hidden storage beneath the tabletop by modifying your design. Cut down a large box height and add internal supports. This creates valuable space for small items in any room.
For sliding mechanisms, create guide rails from cardboard angles. Cut L-shaped openings for smooth operation. Remember that perfect alignment may require adjustments over time.
Reinforce high-stress areas with additional layers. Use hot glue for quick fixes on joints. Apply extra adhesive to sliding components for long-term strength.
Batch process cutting operations to save time. Work on multiple sheets simultaneously while maintaining precision. This efficiency approach benefits all your diy projects.
Creative finishes like craft stick arrangements add unique character. Approximately 250 sticks cut to variable lengths create interesting patterns. Wallpaper application provides superior coverage compared to basic paint.
These tips help you adapt the basic idea for different needs. Focus on functionality rather than perfection when working with this material in your home.
Conclusion
Transforming simple packaging materials into functional home decor demonstrates remarkable creative potential. This project successfully combines sustainability with affordability, proving that beautiful design doesn’t require expensive resources.
You’ve gained the ability to create custom furniture without specialized tools or professional skills. The step-by-step guide showed how proper construction techniques yield durable results. Your finished piece stands as evidence that resourcefulness trumps budget constraints.
Remember to apply sealant after any painting for lasting protection. The minor imperfections in your creation add unique character and handmade charm. Style your new furniture with curated book displays or natural elements from your garden.
The skills you’ve developed extend beyond this single endeavor. Apply your newfound confidence to other home improvements throughout your living space. Share your accomplishments and continue exploring creative solutions that make personal styling both accessible and environmentally conscious.