
The average price for a high-end furniture piece can easily surpass two months’ rent. This reality makes a luxurious living space feel out of reach for many.
But what if you could create a stunning centerpiece for your home without that staggering cost? This project proves that a sophisticated look is entirely achievable. The secret lies in a hands-on approach.
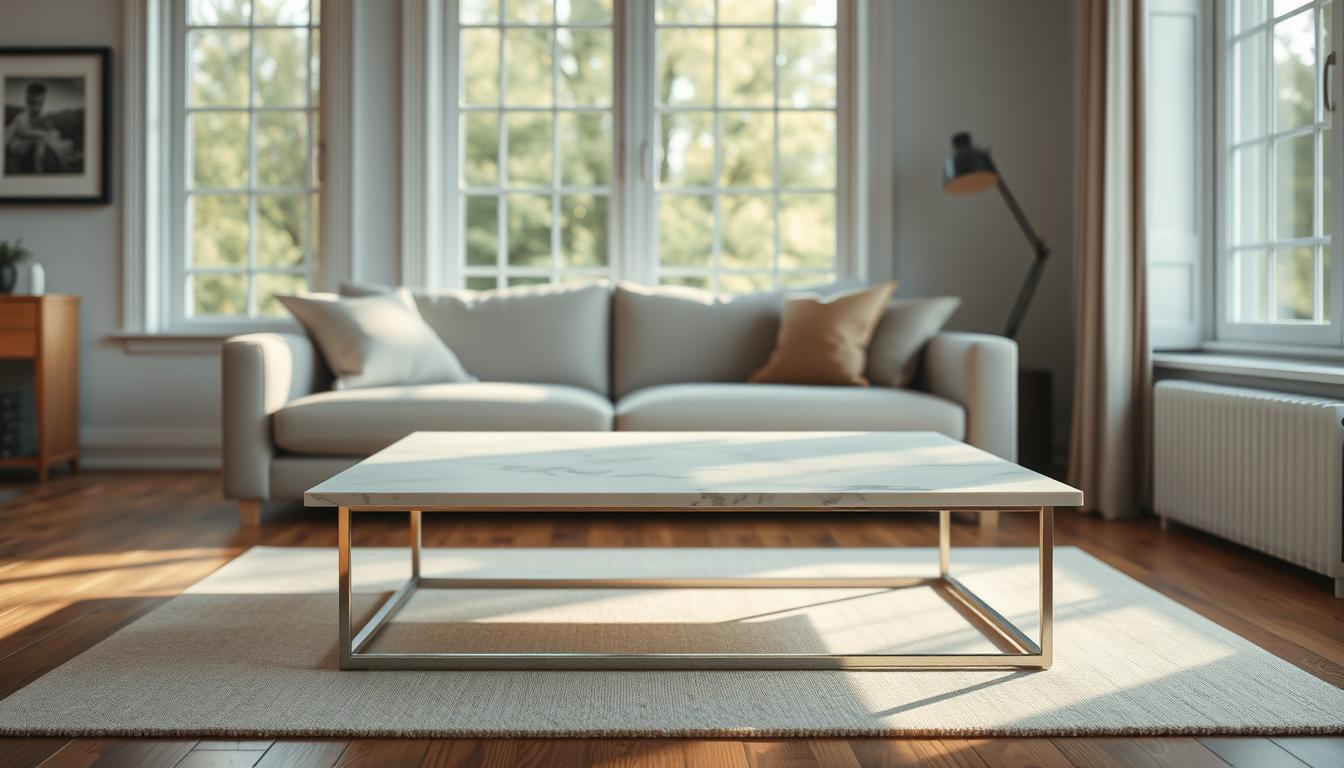
A custom marble coffee table brings a touch of grandeur to any room. The diy method allows you to control the final design and cost. You are not limited to mass-produced style options.
This concept has gained popularity from coast to coast. Homeowners and renters are discovering the joy of building their own beautiful table. The result often rivals a designer piece at a fraction of the price.
Key Takeaways
- You can achieve a high-end furniture look without a high-end budget.
- Building your own piece offers significant cost savings and customization.
- This project is a popular trend for enhancing living spaces affordably.
- The right material choices are key to a professional and durable result.
- This guide will provide a complete roadmap from planning to assembly.
- Personalization allows the final product to match your unique aesthetic.
- Proper execution creates a long-lasting, conversation-starting centerpiece.
Project Overview and Inspiration
The journey to acquiring a statement piece for your living area begins with understanding how resourcefulness can overcome budget limitations. This approach transforms what seems like an expensive endeavor into an achievable goal. Strategic planning makes luxury accessible.

Concept and Budget Considerations
These creative endeavors combine timeless aesthetics with practical financial parameters. You can source materials through unexpected channels that significantly reduce costs. Stone yards often offer remnant pieces at substantial discounts.
One successful creator found a Carrara slab that had been used in a courthouse for years. It required minimal cleaning but became the foundation for an impressive centerpiece. The total investment was remarkably low.
Real-Life Success Stories and Examples
Many people have transformed their spaces with minimal expenditure. One individual spent only $12 on plywood plus leg costs for a stunning result. Another used affordable contact paper to upgrade a thrift store find.
These examples demonstrate that luxury furnishings don’t require luxury spending. With creativity and smart shopping, you can achieve professional results. The time investment often fits into a single weekend.
Whether using genuine stone or quality alternatives, the concept remains accessible. These projects serve as room-transforming focal points that elevate entire spaces beautifully.
Materials, Tools, and Preparation
Before assembly begins, meticulous preparation with the right materials and tools sets the stage for a flawless final product. This phase ensures your creation is both beautiful and structurally sound.

Selecting Your Slab and Base
Your primary choice is the top material. A 36-inch slab offers a great balance of presence and practicality. For the best value, visit local stone yards for remnant pieces.
These offcuts provide authentic stone at a significant discount. For a budget-friendly choice, high-quality contact paper is an excellent alternative.
The base provides crucial support. You can use a simple wood frame or purchase table legs. Ensure each pair has a load rating of at least 150 pounds.
For the lumber substructure, 3/4-inch plywood is ideal. Have the store cut it 10 inches smaller than your top so it remains hidden from view.
Essential Tools and Safety Tips
Having the correct equipment makes the process smooth and safe. Your toolkit does not need to be extensive, but it should be precise.
Use a wood file to smooth the plywood edges. Hold the file perpendicular to the piece and move it straight up and down. This technique creates a clean, professional edge.
When working with a genuine stone slab, always have a helper. The weight requires careful handling to prevent injury.
| Component | Authentic Stone Option | Budget-Friendly Alternative |
|---|---|---|
| Top Surface | Marble or granite remnant slab | Marble-pattern contact paper |
| Base Structure | Solid wood frame or metal legs | 3/4″ plywood with hairpin legs |
| Key Tools | Heavy-duty adhesive, helper | X-acto knife, squeegee, wood file |
Gather your supplies from local stores or online retailers. Specialty legs are often found on Etsy, with links to Amazon for convenience. Proper preparation is your key to success.
DIY Marble Coffee Table: Elegant Design on a Budget – Step-by-Step Process
With your materials gathered, the hands-on construction begins, bringing your vision to life. This phase requires careful execution for a sturdy and polished result.

Cutting, Shaping, and Finishing the Components
Start with your lumber base. Have the store cut the plywood to size, ensuring it is ten inches smaller than your slab on all sides. This creates a proper overhang for the final piece.
Use a wood file to smooth the edges. Hold the file straight up and down for a clean finish. Next, prepare your legs.
Clean them with paint thinner to remove any manufacturing residue. Be aware this step has a strong odor. A quick spray of lacquer protects the metal and dries in a couple of minutes.
Mounting the Legs and Securing the Marble Top
Leg placement is a critical point. For angled hairpin styles, set the brackets a few inches inward from the corners. This prevents tripping and ensures stability.
Mark the drill spots carefully. Use short screws to attach the legs firmly to the underside of the base. They must not poke through the top.
Finally, position your marble top. The significant weight of a genuine stone slab often makes it secure without adhesive. If you use glue, allow a full day for it to cure.
Check that your new coffee table sits level on the floor. This completes the main assembly step of your project.
Expert Tips and Tricks for a Professional Finish
The final phase of your project focuses on refinements that elevate your piece from functional to exceptional. These professional touches ensure your creation stands the test of time while maintaining its beauty.

Weight, Stability, and Maintenance Advice
Marble weighs substantially more than expected. Always verify your base’s load rating meets the 150-pound minimum per leg pair. This prevents stability issues for years.
Apply a penetrating sealer like Miracle 511 immediately after assembly. Use microfiber cloths for even application. Reseal every 3-6 months to protect your investment.
Prompt spill cleanup and coaster use prevent etching. These simple habits maintain the pristine finish of your furniture.
Overcoming Common DIY Challenges
Account for plywood thickness when calculating final height. Leg placement affects both aesthetics and safety. Inward positioning reduces kicking hazards.
Your table might feel too tall initially. Many creators find this height perfect for using as a desk later. The piece integrates beautifully into daily living over time.
Consider rounded edges for homes with children. Remnant sourcing reduces environmental impact while providing quality materials. These options create safer, sustainable furniture.
Personalization and Custom Design Ideas
Your creation becomes truly special when you add your unique flair. This is where a standard piece transforms into a reflection of your personal style.
You have many ways to make it your own. The final look depends on your creative choice.
Custom Finishes and Upcycling Options
Experiment with metallic accents for a glamorous touch. Gold or brass trim on the legs creates an on-trend finish.
Try geometric stenciling with painter’s tape. This adds subtle texture to the base. It elevates the overall design.
For a modern style, consider a two-tone paint job. This color-blocking technique makes a dramatic impact.
Your space dictates the best options. Slim chrome frames keep a contemporary living room feeling light. Dark stained wood provides grounding weight for classic homes.
Consider the size and shape for safety and flow. Oval or circular tops are excellent for homes with young children.
| Design Element | Modern Apartment | Traditional Home | Family-Friendly |
|---|---|---|---|
| Leg Style | Slim chrome | Dark stained wood | Rounded corners |
| Top Shape | Rectangular | Square | Oval or circular |
| Finish Accent | Brushed nickel | Antique brass | Durable sealant |
You can use contact paper for a budget-friendly alternative. This paper offers the marble look without the cost of a slab. Apply it carefully for a seamless finish.
Gather inspiration from platforms like Houzz. Sketch your ideas to visualize the final design. The true luxury is creating something uniquely yours.
Conclusion
Standing back to admire your finished work, you’ll realize this project was about more than just building furniture. It represents a significant step in shaping your home to reflect your personal style.
You now possess the knowledge to create stunning pieces that rival expensive store-bought options. The personalization you achieved makes your table a one-of-a-kind centerpiece for your room.
The true luxury is the satisfaction of creating something with your own hands. This experience builds confidence for future design challenges.
Enjoy your new creation and the beautiful look it brings to your space. It’s the first of many rewarding things you can accomplish.