
Did you know the average American household spends over $1,600 on furniture each year? Many people assume quality home furnishings require a massive budget. But what if you could create a stunning centerpiece for your living room for under $100?
This hands-on endeavor proves that building your own furniture doesn’t require advanced skills or expensive tools. Using common lumber, you can construct a piece that rivals store-bought options in both durability and style. The entire process takes about eight hours from start to finish.
Imagine completing a custom piece over a weekend. The cutting and assembly phase requires just three hours. Finishing work adds the remaining time. This timeframe makes it perfect for beginners and experienced makers alike.
You’ll discover how to transform basic materials into a functional work of art. The design emphasizes structural integrity to prevent common issues like wobbly legs. Proper planning ensures a level surface that will last for years.
This guide covers everything from material selection to final touches. You’ll learn techniques that protect your creation from daily wear. The result is a professional-looking piece that reflects your personal style.
Key Takeaways
- Create custom furniture for your home for under $100
- Complete the project over a single weekend
- Use readily available lumber for sturdy construction
- Avoid common pitfalls like unstable legs
- Customize dimensions to fit your space perfectly
- Learn techniques suitable for all skill levels
- Achieve professional results with basic tools
Planning Your DIY Coffee Table Project
Before cutting your first board, investing time in planning ensures your final piece meets expectations. This initial step transforms your vision into a structured approach. Proper preparation prevents wasted materials and frustration.

Careful planning accounts for your specific space requirements and functional needs. It’s the difference between a piece that fits perfectly and one that feels out of place.
Setting a Budget and Timeline
Establishing a realistic budget keeps your project on track. A complete build can cost around $88 when using discounted materials. This approach helps you identify where to invest and save.
Your timeline should allocate approximately 8 hours total. Plan for 3 hours dedicated to cutting and assembly. The remaining time covers sanding, finishing, and drying between coats.
Sketching Your Design and Measurements
Creating a detailed sketch is your first practical step. Consider standard heights between 16-18 inches for comfort. Account for 18-inch spacing between your sofa and the table.
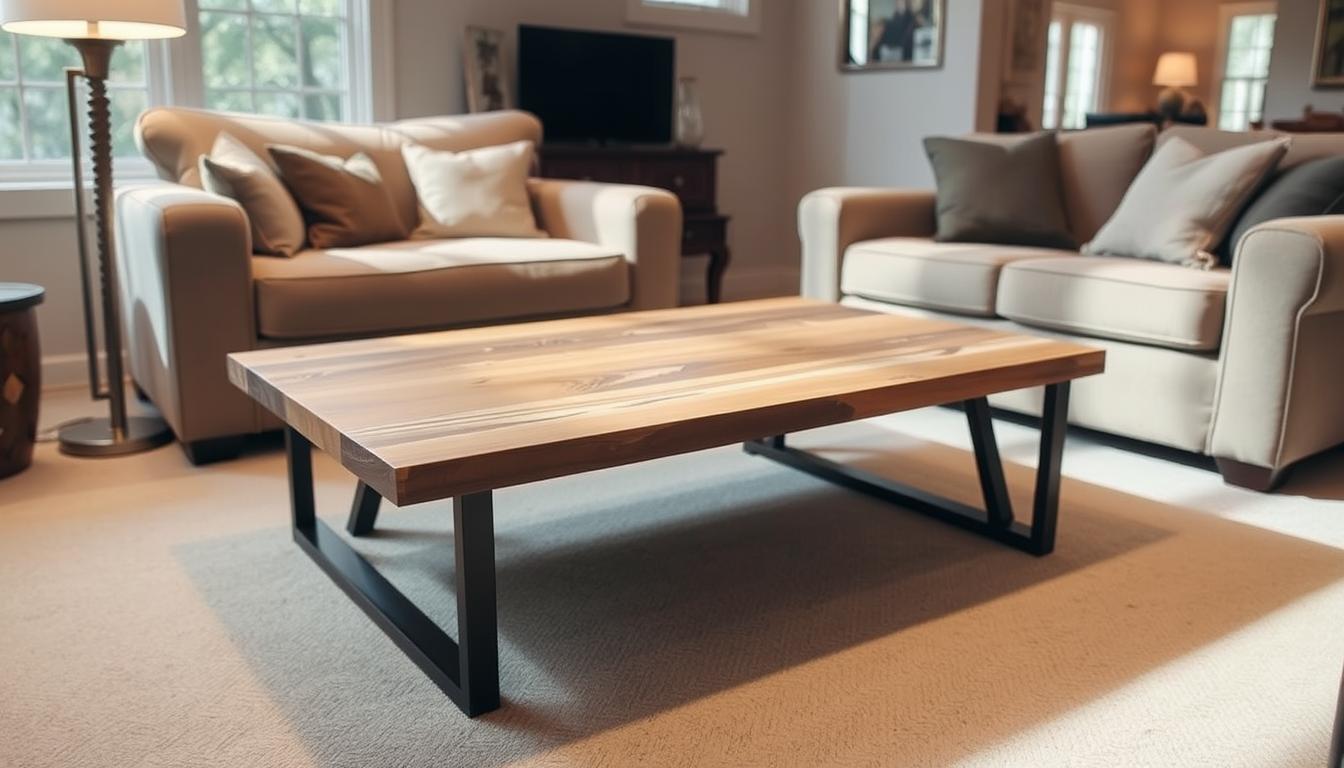
Your design should complement your living room layout. A 47-inch square shape prevents an elongated look. Alternatively, a 40×20-inch rectangular configuration offers different proportions.
Explore design ideas that balance aesthetics with function. Consider storage features and mobility options. Proper planning ensures professional results that enhance your home.
Gathering Materials and Tools
Having a solid plan is just the start. The next critical step is collecting all the right components. Proper materials and tools are the foundation of a successful project.

This preparation phase ensures you won’t have to pause your work. You can maintain your momentum from start to finish.
Essential Materials List
Your project begins with selecting quality wood. You will need five to eight kiln-dried 2x4s. This specific type of wood resists warping and shrinkage. It ensures long-term structural integrity.
For the legs, a single 4×4 post provides excellent stability. This choice creates a piece that stands firmly for years.
Do not overlook the fasteners. Specialized furniture-grade screws are a must. They feature unique head designs that lock into wood without splitting it. Always use heavy-duty wood glue rated ANSI/HPVA Type II for strong joints.
The top surface requires a smooth MDF board at 1/2-inch thickness. For finishing, gather primer, paint, and a clear gloss finish. Low-VOC stains or waterborne polyurethane are recommended for better indoor air quality.
Recommended Tools and Safety Gear
The right tools make all the difference. A miter saw delivers precise angled cuts. A circular saw offers versatility for longer boards. You will need a drill with a countersink bit for clean screw placement.
A Kreg jig is invaluable for creating strong, hidden pocket holes. An orbital sander prepares surfaces for a smooth finish. To attach the MDF top securely, a brad nailer works perfectly.
Never compromise on safety. Always wear protective glasses and ear protection. These items shield you from potential hazards during cutting and drilling.
Consider optional upgrades like locking casters for mobility. Metal corner brackets can add an industrial touch. Additional boards can create a handy lower shelf for extra storage.
Cutting and Assembling the Frame
The transformation from raw lumber to furniture begins with precise cutting techniques. This phase determines how well your components fit together during assembly. Proper measurement and cutting create the foundation for a stable final product.

Start by measuring eight 2x4s to 40 inches in length for the main frame structure. These pieces form the horizontal support system. Accuracy at this stage prevents alignment issues later.
Measuring and Cutting 2×4 Components
Cut four leg pieces from 4×4 stock at 17 inches height. If your miter saw cannot cut through the thickness in one pass, use a two-step method. Cut halfway through, flip the piece, then complete the cut from the opposite side.
Marking all around thicker lumber ensures clean, square cuts. Beginners should use this technique for consistency. Experienced builders may develop the skill to eyeball alignment successfully.
Utilizing a Miter Saw and Circular Saw Techniques
Your miter saw creates perfect crosscuts for frame components. The circular saw handles longer rip cuts when breaking down full-length boards. Always cut with the grain direction to highlight natural wood patterning.
Sand all pieces with 120-180 grit sandpaper before assembly. Smooth corners eliminate potential snags. This preparation is especially important for households with children or pets.
Organize your cut pieces by function—legs, rails, aprons, and top boards. Verify each measurement before proceeding to assembly. This organization prevents mistakes and maintains project momentum.
DIY Coffee Table With 2x4s: Strong And Affordable Build – Step-by-Step Process
Now comes the most rewarding phase of your project—assembling the components into a solid frame. This systematic approach ensures professional results.
Step-by-Step Assembly Overview
Begin by laying your planks side by side for the surface. Apply wood glue between each seam. Clamp everything tightly for 1-3 hours to eliminate gaps.
This creates a unified surface that won’t separate under use. The assembly step continues with securing apron rails flush with the edges.
Attach legs at each corner while verifying perfect 90-degree angles. Use a carpenter’s square to ensure your creation sits level.

Using a Kreg Jig for Secure Pocket Holes
The Kreg jig creates invisible holes that deliver exceptional strength. Create pocket holes on both sides of your frame pieces before assembly.
Use specialized furniture screws available at major retailers. Their unique head designs prevent splitting issues common with standard construction fasteners.
For optimal results, drill pilot holes using a two-step approach. Start with a large bit partway through frame boards, then complete penetration with a smaller bit.
This technique prevents wood splitting while allowing screw heads to sit flush. The result is commercial-grade stability for your finished table.
Attaching the Table Top and Applying Finishes
Your creation transforms from a structural frame to a polished centerpiece through meticulous finishing work. This phase requires patience and attention to detail for professional results.
Tracing, Cutting, and Fitting the MDF Board
Position your MDF board over the assembled frame to trace a precise outline. Cut the material slightly oversized using a circular saw. This approach allows for final adjustments.
Sand the edges flush for seamless integration with your furniture frame. The brad nailer attachment method secures the board firmly. This technique minimizes visible fasteners while ensuring stability.

Primer, Paint, and Clear Gloss Finish Techniques
Begin by filling countersunk screw holes with stainable wood filler. Allow complete drying before sanding smooth. Vacuum all dust to create a clean surface for finishing.
For painted surfaces, apply a protective clear gloss coat first. This strategy safeguards the MDF board from moisture. Then proceed with your chosen paint sheen.
Staining requires thin, even coats that penetrate the wood grain. Follow with multiple protective sealer layers. Light sanding between coats ensures a smooth professional finish.
| Finish Type | Application Method | Drying Time | Best For |
|---|---|---|---|
| Paint | Primer then 2-3 thin coats | 2-4 hours between coats | Modern, colorful designs |
| Stain | Thin, even penetration | 6-8 hours before sealing | Natural wood appearance |
| Clear Lacquer | Multiple light sprays | 1-2 hours between coats | Contemporary minimalism |
| Distressed | Base coat + sanding technique | Full drying before distressing | Farmhouse character |
Choose low-VOC products meeting ANSI/HPVA HP-1 standards for family safety. The finishing process often exceeds assembly time but delivers lasting protection.
Design Enhancements and Personalization
Your completed frame now becomes a canvas for creative expression. This is where your unique vision transforms the basic structure into a centerpiece that reflects your personality.
Thoughtful styling choices ensure your new piece harmonizes with your existing décor. It creates a cohesive look for your entire living area.
Custom Decor and Styling Ideas
Explore proven styling concepts from successful projects. A basket tray and candle create a simple, elegant focal point.
White planters with living thyme offer a modern, low-maintenance aesthetic. This approach complements larger plants like a fiddle leaf fig in the corner.
Layered rugs with neutral patterns add texture and contrast. Consider these functional upgrades for your furniture.
| Enhancement | Style Benefit | Functional Gain |
|---|---|---|
| Brass Corner Brackets | Adds luxe, industrial accent | Reinforces joint strength |
| Integrated Lower Shelf | Creates layered visual interest | Organizes books and baskets |
| Wall-Mount Hooks on Apron | Minimalist, hidden storage | Keeps remotes accessible |
| Locking Casters | Modern, utilitarian look | Enables flexible room arrangements |
Adapting the Design to Your Living Room Layout
Modify the dimensions to perfectly suit your space. A square footprint helps unify a room without creating an elongated look.
Adjust the height and length to serve as a compact bench or a TV console. The same construction skills apply to these versatile projects.
Your finish choice dramatically alters the character. A light stain creates farmhouse charm, while a vivid paint color energizes the entire room.
These adaptations ensure your final piece feels custom-made for your home. It becomes a natural extension of your living environment.
Conclusion
The skills you’ve acquired through this endeavor open doors to countless future projects. Your completed piece demonstrates how basic materials transform into quality furniture through careful planning and execution.
This weekend project delivers exceptional value, costing under $100 and requiring about eight hours of your time. The result rivals store-bought options in both durability and aesthetic appeal.
You now possess fundamental woodworking techniques that apply to various home improvement endeavors. Consider adapting these methods for coordinating pieces like end tables or storage benches.
Your creation serves as both functional furniture and a canvas for personal expression. It withstands daily use while reflecting your unique style preferences.