
Did you know the average American home contains over 300,000 items? This staggering number reveals why smart storage solutions have become essential for modern living spaces. As homes grow more compact, every piece of furniture must serve multiple purposes.
Creating your own custom centerpiece offers remarkable advantages. You gain complete control over dimensions, materials, and functionality. This approach transforms ordinary living areas into organized, stylish environments.
Building functional furniture allows you to develop valuable woodworking skills. The process combines traditional craftsmanship with contemporary design elements. You can tailor every aspect to match your specific decor preferences and storage requirements.
This guide explores various approaches suitable for different skill levels. From simple constructions using basic tools to advanced techniques incorporating modern features, there’s an option for every enthusiast. Proper planning ensures your creation meets both aesthetic and practical needs.
Key Takeaways
- Custom furniture projects maximize storage while maintaining clean aesthetics
- Building your own piece develops valuable woodworking skills
- Multiple skill level approaches accommodate beginners and experts
- Proper planning prevents common construction mistakes
- Custom dimensions ensure perfect fit for your space
- Hidden compartments maintain visual appeal while adding functionality
- Modern techniques can include lighting and electronic components
Overview and Inspiration
Successful builds from other creators provide a wealth of design inspiration. Examining these completed pieces helps you visualize the potential for your own living area. You can see how clever storage integrates seamlessly into attractive furniture.
Setting the Scene for Your Project
You will find a stunning variety of designs. Some feature rustic, farmhouse charm with simple lift-top mechanisms. Others boast sleek, modern profiles with electronic openers.
This versatility means your creation can perfectly match your room’s existing style. The final look should feel intentional, not like a simple storage box.

Why Hidden Storage Makes a Difference
The primary advantage is the elimination of visual clutter. Your living area maintains a clean and organized appearance. This approach maximizes your available floor space efficiently.
It offers convenient access to items you use daily. Think of remote controls, reading materials, or cozy blankets. Everything has a dedicated spot, yet remains out of sight.
| Style Focus | Storage Mechanism | Ideal For Storing | Skill Level |
|---|---|---|---|
| Rustic / Farmhouse | Hinged Lift-Top | Blankets, Board Games | Beginner |
| Modern / Contemporary | Sliding Panels | Magazines, Electronics | Intermediate |
| High-Tech | Electronic Actuators | Valuables, Controllers | Advanced |
Planning Your Build: Materials and Tools
The quality of your finished piece depends heavily on your initial material and tool selection. Proper planning prevents wasted resources and ensures a smooth construction process. You’ll want to gather everything before starting.

Essential Materials Overview
Your material choices determine the project’s durability and appearance. Select plywood with appropriate thickness for structural integrity. For framework, quality lumber provides essential support.
Fasteners like screws and nails create strong connections. Wood glue adds extra strength to joints. Consider finishing supplies for the final aesthetic touch.
Must-Have Tools for the Job
Precision cutting requires the right saw for clean results. A reliable drill handles various fastening tasks. Specialized tools like a pocket hole jig enable hidden joinery.
Clamps maintain alignment during assembly. Measuring tools ensure accurate dimensions. Having the right equipment makes the process efficient.
| Category | Essential Items | Purpose | Priority Level |
|---|---|---|---|
| Materials | Plywood, lumber | Structural framework | High |
| Fasteners | Screws, nails | Secure connections | High |
| Cutting Tools | Saw, blades | Precise dimensions | High |
| Joinery | Pocket hole jig | Hidden fastening | Medium |
| Finishing | Sandpaper, stain | Final appearance | Medium |
Your plans should account for all necessary components. Having materials and tools organized saves valuable time. This preparation leads to professional-looking results.
DIY Coffee Table Ideas with Hidden Storage Compartments
The integration of concealed spaces requires thoughtful consideration of both functionality and aesthetics. Your approach to creating these secret areas determines how well they serve your storage needs while maintaining visual appeal.
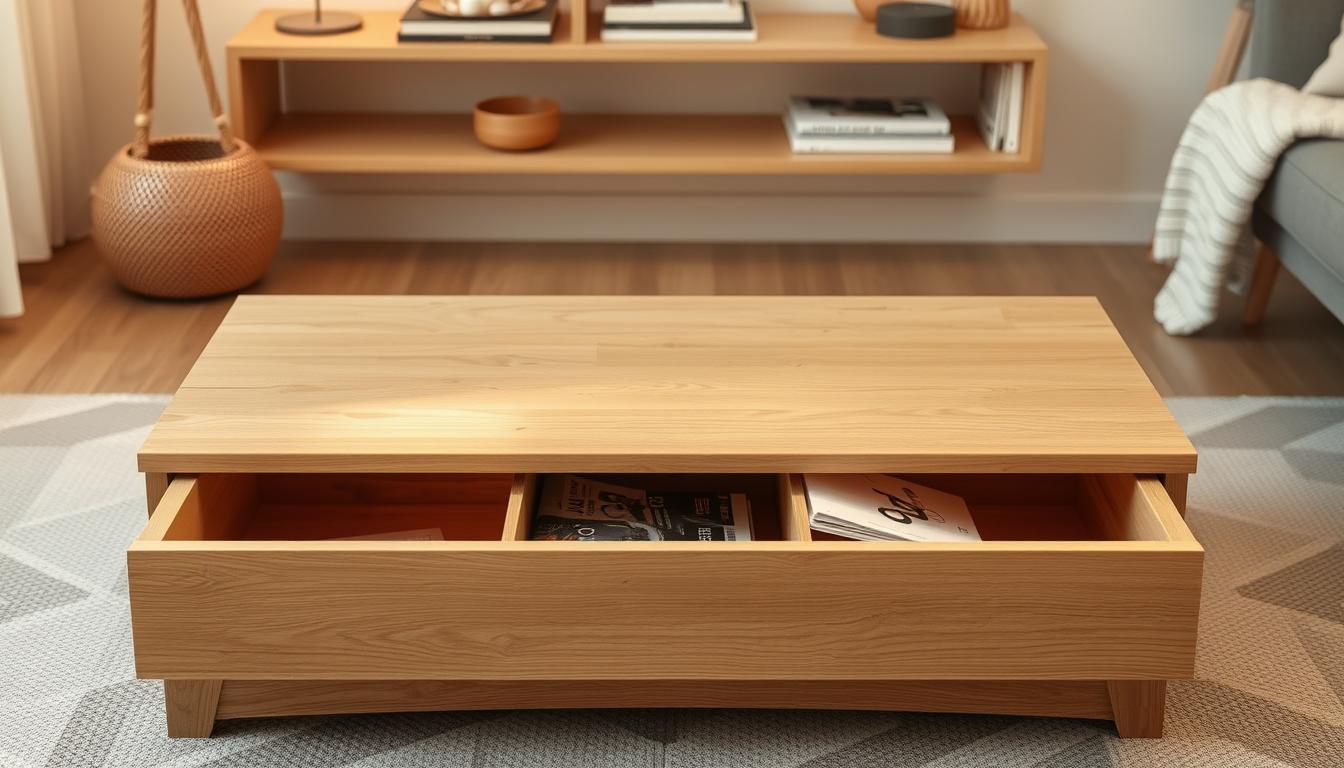
Incorporating Hidden Compartments
You have several options for creating accessible yet discreet storage. Drawer slide mechanisms offer one way to implement pull-out functionality. Lift-top designs using hinges provide another approach for top access.
Sliding panel systems create seamless surfaces that reveal interior space when moved. Each method balances convenience with concealment differently. Your choice affects the overall complexity of your build.

Design Considerations and Customization
Standard dimensions for furniture typically range from compact 24-inch heights to larger 48-inch lengths. You’ll design based on your specific space requirements. Consider double-paneling on visible surfaces for a substantial appearance.
Interior organization within the storage box enhances usability. Adding dividers creates separate zones for different items. Custom aesthetic elements ensure your creation matches existing décor rather than appearing as a generic piece.
Step-by-Step Construction Process
Your construction journey begins with transforming raw materials into precise components. This phase requires methodical execution to ensure your final piece meets both aesthetic and functional standards. Each action builds upon the previous one.
Getting Started with Plywood and 2x4s
Your first step involves breaking down full plywood sheets. Use a circular saw with a straightedge guide for initial rough cuts. This process creates manageable pieces for further refinement.
Move to a table saw for precision work. This tool delivers cleaner edges and exact dimensions for all panel pieces. Accurate cuts at this stage prevent alignment issues later.
Construct the moving section first for designs with sliding mechanisms. Double up panels to achieve a substantial appearance rather than using thin single-layer construction. This approach adds durability.

Your assembly technique should include a brad nailer. This tool quickly secures pieces during glue application. It prevents shifting while you add clamps for proper curing pressure.
Precision Cuts and Pocket Hole Installation
Create the fixed framework by ripping 2×4 lumber to specific widths. Cut legs to your desired height and measure side pieces to form the perimeter structure. These elements provide the core support.
Your structural connections use wood screws driven through pilot holes. Combine this with wood glue for joints that remain solid under weight and movement. This combination creates long-lasting stability.
Employ pocket hole joinery for attaching panels where visible screws would detract from the finished appearance. Position your Kreg Jig to create angled holes on hidden surfaces. This technique offers clean, professional results.
Your bottom panel installation involves cutting cleats that provide a supporting ledge. Secure the panel with glue and brad nails driven from the top side. This completes the main structure before final assembly.
Incorporating Electronic and Modern Features
Electronic components transform your custom furniture into a smart, contemporary centerpiece for any living space. These advanced elements add both functionality and visual appeal to your project.
Modern technology integration represents the next evolution in furniture design. You can create pieces that respond to your needs with precision and style.
Installing LED Strips and Actuators
Linear actuators serve as the mechanical heart of your automated system. Position them in the center for balanced lifting force across the entire surface.
Secure the motor end to the bottom structure using nuts and bolts. This creates a stable pivot point for smooth operation.
Attach the extending part to the moving piece using a custom bracket. This connection provides strength without adding excessive bulk.
Your wiring configuration connects actuators to a 4-channel wireless receiver. This allows remote control operation for convenient access.
Install LED strips within aluminum channel along the interior perimeter. This method diffuses light and creates a professional appearance.
Integrating Power Outlets and Chrome Feet
Add modern functionality by installing a pull-up power outlet. This requires precise hole drilling through the top panel.
Create an additional hole below for power cord passage. This keeps wiring organized and hidden from view.
Your finishing touches include attaching chrome furniture feet to the bottom corners. These elevate the piece slightly while protecting your flooring.
The chrome feet add a contemporary design element to the overall appearance. They complete the modern aesthetic in a practical way.
Finishing Techniques and Aesthetic Enhancements
The final appearance of your custom furniture project depends heavily on the finishing techniques you choose. This phase transforms raw construction into a polished centerpiece that complements your living space.
Proper finishing protects your investment of time and effort. It also elevates the overall look from basic to professional.
Surface Preparation, Sanding, and Staining
You will dedicate significant time to sanding all surfaces. Progress through increasingly fine grits to eliminate imperfections. This creates the smooth foundation needed for beautiful finishes.
Apply Bondo filler to any gaps between panel joints. Once cured, sand these areas smooth for seamless transitions. Your preparation work determines how well stains and paints adhere.
Primer serves as your first coating layer. It reveals any remaining flaws while providing tooth for subsequent layers. This step marks visible progress in your project.
Staining brings out the natural wood grain character. Colors like Minwax Dark Walnut create rich contrast when paired with painted elements. Apply stain evenly across the top surface for consistent results.
Applying Vinyl, Paint, and Protective Coatings
Select white gloss oil-based paint for high-traffic surfaces. This creates durable, wipeable areas that resist daily wear. Paint structural elements and corner pieces for two-tone visual interest.
Vinyl application requires thoroughly clean surfaces. Work methodically from one side to prevent bubbles. Thicker architectural vinyl yields better results than standard options.
Your final protective coating seals all surfaces. Polycrylic offers water-based convenience while polyurethane provides maximum durability. Both options protect your time-intensive finishing work.
Practical Tips and Troubleshooting
Troubleshooting common assembly issues is an essential skill that transforms frustrating setbacks into valuable learning experiences. Your ability to adapt when components don’t fit perfectly often determines the final quality of your finished piece.
Overcoming Common Assembly Challenges
You’ll frequently encounter drawer slide alignment problems that require patient adjustment. Multiple attempts may be needed to achieve smooth operation without binding between moving parts.
Misaligned hole positions can derail your progress. Relocating hardware to interior positions often resolves functional issues when initial placement proves problematic.
Time Management and Quick Fix Strategies
Your project time estimates should include buffer periods for unexpected complications. Most builders fall behind schedule when facing alignment issues or measurement discrepancies.
Identify quick wins during frustrating phases. Applying primer transforms raw wood into a finished-looking piece, renewing motivation after setbacks.
Magnetic catches provide easy access to panels without complex mechanisms. This simple way eliminates visible screws while maintaining functionality.
| Challenge | Common Cause | Quick Solution | Prevention Tip |
|---|---|---|---|
| Drawer binding | Misaligned slides | Relocate interior mounting | Double-check measurements |
| Gaps at joints | Slight measurement errors | Wood filler application | Use precise cutting guides |
| Hardware misalignment | Template inaccuracies | Magnetic catch alternative | Test fit before final installation |
| Time overruns | Unexpected complications | Focus on one step at a time | Add 20% buffer to estimates |
Conclusion
Your completed furniture project represents more than just a functional piece for your living space. It embodies the skills you developed throughout this comprehensive building journey.
Following detailed plans and video tutorials gave you the structured guidance needed for success. You transformed raw pieces of lumber and plywood into a sophisticated center table with clever storage solutions.
The techniques you mastered—from precise cutting with your saw to secure assembly using screws, nails, and pocket hole joinery—prepare you for future design challenges. Your new build serves as both practical furniture and inspiration for what you can create.
This idea has now materialized into a reality that maximizes your available space while maintaining professional quality. You’re ready to set your sights on the next project with confidence.