

The average American household now contains more than 10 connected devices, yet most living rooms lack dedicated charging spaces. This creates a daily struggle with tangled cords and low batteries.
Imagine transforming your living space with a centerpiece that solves this modern problem. You can create a functional piece that combines traditional craftsmanship with smart technology.
This comprehensive guide takes you through the entire process. You’ll learn to build a multifunctional furniture piece that serves as both a stylish table and a charging hub.
The project blends practical woodworking skills with electronics integration. You can customize every aspect to match your home decor and specific needs.
You’ll understand the principles behind wireless charging technology and LED control systems. This knowledge makes the build process safe and achievable for various skill levels.
Key Takeaways
- Transform standard furniture into a modern, multifunctional centerpiece
- Combine wireless charging capabilities with dynamic LED lighting
- Follow a complete guide from initial planning to final assembly
- Integrate cutting-edge technology into traditional woodworking
- Create a charging hub for multiple devices simultaneously
- Customize appearance and functionality to match your decor
- Learn safe power management principles for home projects
Introduction and Project Overview
Contemporary homes require furniture that serves multiple functions, particularly as the number of electronic devices continues to grow in most households. This project transforms a basic piece into a smart centerpiece that addresses modern living needs.

You’ll create a piece that combines three essential features: elegant furniture design, wireless charging capabilities, and customizable ambient lighting. The build accommodates multiple devices charging simultaneously while maintaining a clean aesthetic.
This project offers flexibility in complexity. You can choose between a straightforward version with basic components or an advanced system with interactive controls. The choice depends on your technical comfort level and available time.
| Aspect | Simple Configuration | Advanced Configuration |
|---|---|---|
| Charging Capabilities | Basic wireless pads | Multiple zones with smart detection |
| Lighting Features | Standard LED strips | Programmable RGB with sensors |
| Technical Requirements | Basic wiring skills | Programming knowledge needed |
| Time Investment | 1-2 weekends | 3-4 weekends |
The design solves the common problem of cable clutter while maximizing your living space. You can customize dimensions, finishes, and technological elements to match your specific requirements.
This approach blends traditional woodworking techniques with contemporary electronics integration. The result is a conversation piece that’s both beautiful and remarkably functional for today’s connected lifestyle.
Project Planning and Design Considerations
Before cutting any materials, careful consideration of your specific needs will determine the project’s success. This planning phase establishes the foundation for your entire build.

Thoughtful preparation ensures your piece integrates seamlessly into your living space. It also guarantees all technical requirements are met effectively.
Defining Your Style and Functional Needs
Your personal aesthetic preferences guide the overall design direction. Consider whether modern minimalist, rustic wood, or industrial styles best suit your decor.
Functional requirements dictate the complexity of your build. Determine if you need basic wireless charging or additional features like USB ports and smart lighting controls.
Budget and Time Allocation
Realistic financial planning is essential for this type of project. Costs can range from under $100 for basic materials to several hundred for premium components.
Time commitment varies significantly based on your chosen feature set. A simple version might take one weekend, while advanced configurations require several weeks.
Measure your intended placement area carefully. Verify device compatibility with Qi standards before finalizing your charging zone layout.
Essential Materials and Tools
Proper preparation begins with sourcing quality components that will ensure your build’s durability and functionality. Having the right supplies before starting saves time and prevents frustration during assembly.
Wood, MDF, and Metal Components
Select medium-density fiberboard for the main structure. Use 18mm thick sheets for the sides and 8mm for interior panels. This material offers excellent stability and takes paint beautifully.
For the frame and legs, choose solid pine boards or similar wood species. These provide the necessary strength while allowing for attractive finishing. Inspect each piece carefully for warping before cutting.

Metal components add both function and style. Consider chrome feet for a modern look or corner brackets for extra leg support. These elements enhance the table’s overall durability.
Electronics, LED Strips, and Power Supplies
Your electronic components form the smart features of your table. Choose Qi-certified wireless charging pads rated for fast charging. These ensure compatible devices charge efficiently.
For lighting, select addressable LED strips that allow individual control. These connect to a controller board for advanced effects. A robust 5V power supply handles both the lighting and sensor systems.
| Component Type | Basic Build | Advanced Build |
|---|---|---|
| Wood Material | Standard MDF panels | Premium hardwood options |
| LED System | Single-color strips | RGB addressable strips |
| Charging Technology | Basic wireless pads | Fast-charging multi-zone pads |
| Control System | Manual switches | Programmable microcontroller |
Essential fasteners include wood glue for strong bonds and various screws for secure assembly. Don’t forget safety items like heat-shrink tubing for professional wire connections.
Preparing Your Workspace and Measuring for Precision
The quality of your final piece depends heavily on the initial preparation of your cutting area and measurement techniques. This crucial step ensures safety and accuracy throughout your project.
Begin by clearing ample space for handling full plywood sheets. You need room to maneuver materials safely without obstructions. Large sheets require breakdown with a circular saw before precise cuts on your table saw.

Create a reliable cutting guide by securing scrap wood to your workbench. This system handles wider pieces that won’t fit against the table saw fence. Install a stop block for consistent repeated cuts on identical components.
Your pocket hole jig becomes essential during preparation. Pre-drill angled holes in frame pieces for strong, hidden joints. Double-check all dimensions before cutting to avoid assembly errors.
| Workspace Element | Basic Setup | Advanced Setup |
|---|---|---|
| Cutting Area | Clear floor space | Dedicated workbench station |
| Measurement Tools | Tape measure and square | Digital calipers and laser level |
| Material Organization | Grouped by component type | Labeled and sequenced system |
| Safety Features | Basic eye protection | Full workshop safety gear |
Organize all cut components before assembly. Group similar parts together and keep hardware within easy reach. This systematic approach saves time and prevents mistakes during construction.
Cutting and Assembling the Wood Components
The structural integrity of your project depends entirely on accurate wood component fabrication and secure joining methods. This phase transforms individual pieces into a cohesive framework that supports both aesthetic and functional elements.

Table Saw and Circular Saw Techniques
Begin constructing the main box by applying wood glue generously to corner edges. Use corner clamps to maintain perfect 90-degree angles during assembly. This ensures your box remains square throughout the process.
Reinforce joints beyond adhesive bonding by screwing small wooden blocks into interior corners. These create incredibly strong connections that support significant weight. The bottom panel attaches with abundant glue and multiple screws through pre-drilled holes.
Creating a Flawless Grid Structure
Cut twelve MDF pieces precisely to form your internal grid system. The professional technique involves wrapping all pieces together with masking tape before cutting dadoes simultaneously. This guarantees perfect alignment for interlocking components.
Your grid pieces lock together through their precisely cut slots, creating a stable matrix inside the table. This structure supports the top surface while organizing compartments for electronic components. Address any gaps between panels immediately with wood filler while assemblies remain clamped.
Frame assembly utilizes pocket hole joinery for invisible connections. Drill angled holes on inner surfaces using a pocket hole jig, then drive specialized screws through these openings. Attach legs using the same technique, positioning fasteners on top surfaces where they’ll remain hidden.
Integrating Power Components and the Charging System
Your build transitions from basic furniture to smart technology hub through strategic placement and wiring of electrical systems. This phase brings your piece to life with modern functionality.
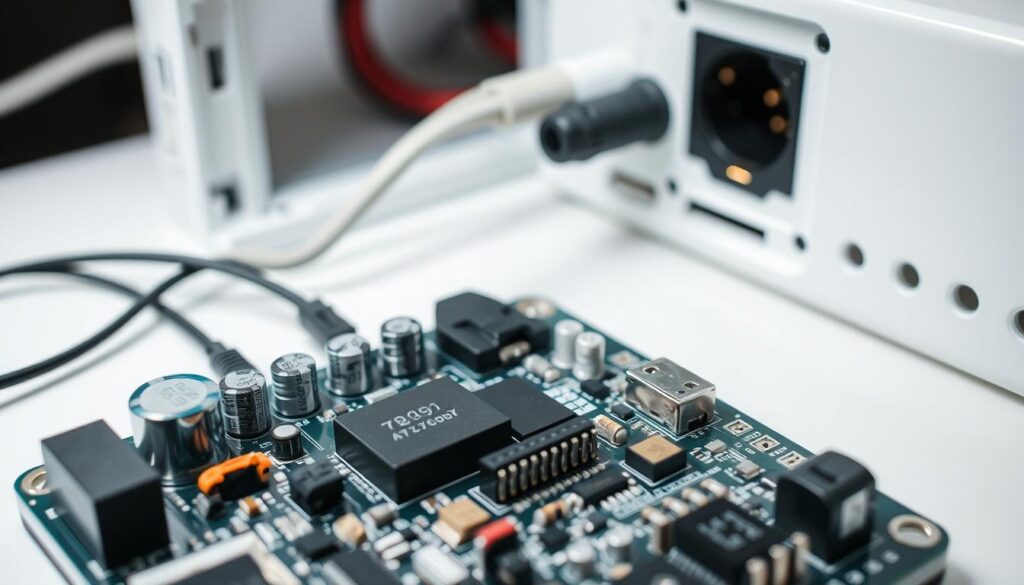
Begin by creating access points for your power infrastructure. Drill a 6mm hole for the main power cord entry. Make another precisely sized opening for mounting the control switch.
Install your power supply unit on the bottom surface. Elevate it slightly on small MDF blocks to ensure adequate airflow. This prevents overheating during extended use.
The main cord connects to your supply and passes through the pre-drilled hole. Wire the switch inline for convenient control. This connection manages the entire system’s power flow.
| Integration Feature | Standard Approach | Enhanced Approach |
|---|---|---|
| Power Access | Single cord entry point | Multiple strategic access holes |
| Charging Technology | Basic wireless pad mounting | Multi-zone charging with ventilation |
| Additional Outlets | None included | Pull-up outlet compartment |
| Safety Features | Basic switch control | Overheat protection and surge guarding |
For wireless charging, ensure the material between charger and device is non-metallic. Keep thickness under a quarter-inch for optimal efficiency. Position the pad where it receives adequate ventilation.
Use a high-wattage wall adapter for fast charging capabilities. Route all cables neatly underneath the table using clips. Test every connection before final assembly to verify proper function.
Each device charging zone should receive thorough testing. Confirm the switch controls the system correctly. Your table now offers both style and smart functionality.
Designing a DIY Coffee Table with Built-In Charging Station and LED Lighting
Following a systematic approach to construction allows you to tackle complex elements methodically while celebrating small victories along the way. This step-by-step process ensures each component receives proper attention.
Step-by-Step Highlights from the Woodworking Process
Begin with the moving section if your design includes a sliding top. Double up visible panels by gluing two layers together for a substantial, premium appearance.
Address impatience during glue drying by using a nail gun for quick holds before applying clamps. Construct the fixed part with similarly doubled panels, securing inner parts with pocket hole screws.
A divider in the middle creates empty space for hiding electrical components. When facing challenges like drawer slide alignment, push through to the next step for momentum renewal.
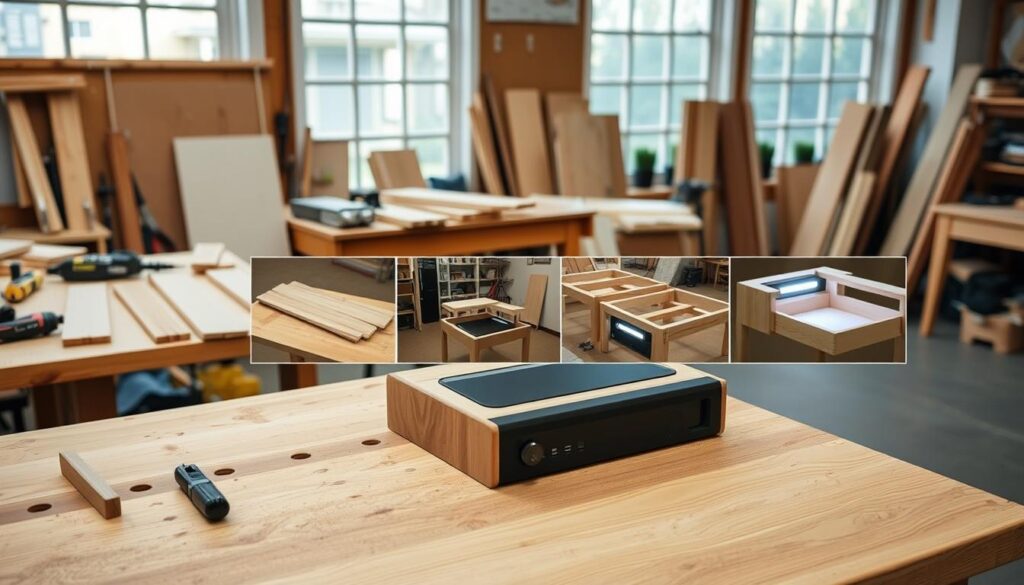
Guidance on Installing Electronics and LED Elements
Prepare the interior board that will house all your electronic devices. This panel may need division into sections depending on your design complexity.
Drill precisely positioned holes for led lights and wire pass-throughs. Install led elements with attention to polarity and connection sequence.
Organize wires by color and use hot glue to secure components. Test-fit all electronics before permanent installation to ensure proper function.
This systematic approach transforms individual pieces into a cohesive box structure that supports both your table‘s aesthetic and functional requirements.
Installing and Wiring the LED Lighting Features
Your lighting installation brings the final layer of smart functionality to your project. This phase transforms your piece with dynamic visual effects.
You can create everything from subtle ambient glows to interactive patterns.

Optimal Positioning and Adjustments for LED Strips
Begin by preparing your addressable led strip. Cut individual units for precise placement. Solder short wires to each light: red for power, black for ground, and green for data.
The data line creates a chain. Connect the output of one led to the input of the next. This connection allows individual control.
For consistent power, use copper wire rails. Solder all red wires to the positive rail. Attach all black wires to the negative rail. This simplifies your power distribution.
| Installation Method | Standard Approach | Enhanced Approach |
|---|---|---|
| LED Mounting | Directly to the panel | Within aluminum channels |
| Visual Effect | Focused beam lighting | Diffused, professional glow |
| Complexity & Cost | Lower investment | Higher finish quality |
Strategic placement defines the final effect. Perimeter mounting creates edge lighting. A grid under glass enables interactive responses.
Integrate your wireless receiver or Bluetooth module. This device enables smartphone control. You can adjust colors and patterns remotely.
Always include a 330-ohm resistor on the data line. This protects the signal from noise. It ensures reliable communication with every light.
Finishing Touches: Painting, Staining, and Vinyl Application
Applying the finishing touches transforms your functional build into a polished centerpiece for your living space. This phase brings aesthetic harmony to your technical achievement.
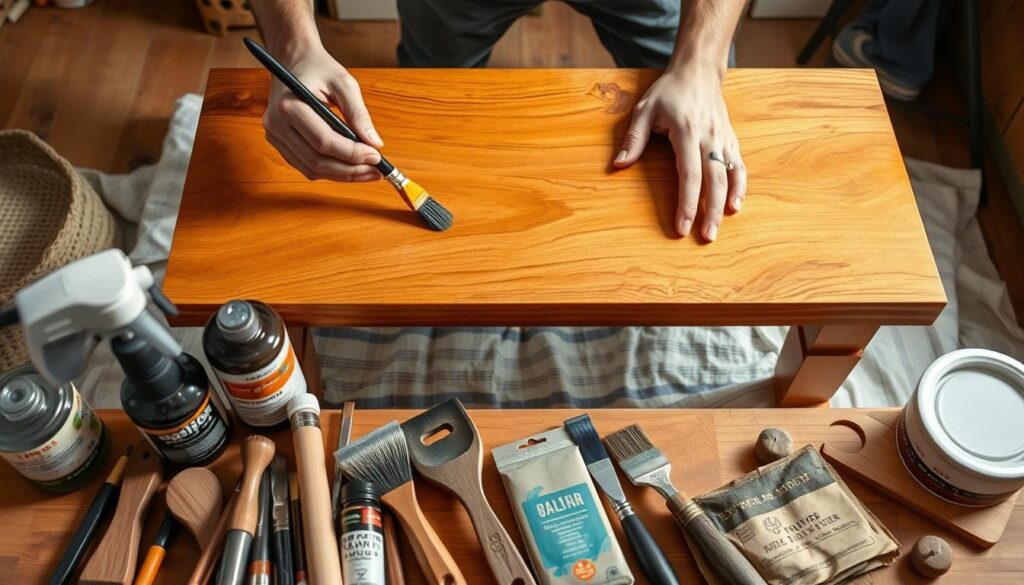
Begin by sanding all visible wood surfaces thoroughly. Start with 80-grit paper to remove imperfections, then progress to 120-grit for a smooth finish.
Your painting technique requires careful masking along edges. Apply tape to each side where different finishes meet. This ensures crisp, clean lines between colors.
Use oil-based primer with a roller for large flat areas. A quality brush works better for corners and detailed sections. Sand lightly after the primer dries completely.
Apply multiple thin coats of white oil-based paint rather than one thick layer. This prevents drips and ensures even coverage across the entire surface.
For the frame and legs, choose rosewood stain instead of paint. This creates beautiful contrast against the white interior. Apply following the wood grain for professional results.
Vinyl wrap application demands a perfectly clean surface. Work gradually from one edge to the other, smoothing out air bubbles as you progress. The thicker vinyl provides exceptional durability.
The glass top installation completes your project. Matte glass cut to precise dimensions sits flush with the table edges. This protective surface diffuses lighting beautifully.
| Finishing Element | Standard Approach | Premium Approach |
|---|---|---|
| Surface Preparation | Basic sanding sequence | Progressive grit refinement |
| Paint Application | Brush and roller method | Spray system for flawless finish |
| Protective Top Layer | Standard glass panel | Tempered safety glass |
| Edge Treatment | Basic masking technique | Professional tape systems |
Final touches include wrapping access panels with matching vinyl. This ensures seamless integration with the main surface. Install chrome feet and magnetic catches for complete functionality.
Testing, Troubleshooting, and Final Adjustments
The final phase of your build ensures every electronic component functions perfectly before daily use. Begin with comprehensive electrical testing using a multimeter. Check for continuity in your power circuits to prevent short circuits.
Your first power-up verifies all systems work correctly. Confirm LED lights illuminate properly and wireless charging activates when devices are placed on designated areas. Test each feature systematically to isolate any issues.
Troubleshoot non-functional LEDs by checking individual connections and solder joints. Ensure the data line sequences correctly and power reaches every component. This step prevents frustration during final assembly.
Interactive features may need fine-tuning. Adjust infrared sensor angles so objects on the surface properly trigger responses. Cover any interfering indicator lights with electrical tape for clean lighting effects.
| Testing Component | Basic Method | Advanced Technique |
|---|---|---|
| Wireless Charging | Device placement test | Efficiency measurement |
| LED Lighting | Visual inspection | Programmable pattern testing |
| Sensor Systems | Manual triggering | Calibration software |
| Control Mechanisms | Switch functionality | Remote connection reliability |
Test all control methods thoroughly. Verify switches, remote receivers, and smartphone connections work reliably. Make final adjustments to brightness levels and charging pad positions.
This systematic approach ensures your creation performs flawlessly. The end result is a reliable piece that combines technology with furniture seamlessly.
Conclusion
Your successful build represents the perfect fusion of craftsmanship and modern technology. This ambitious project combines traditional woodworking with smart electronics integration.
At the end of this journey, you have more than just a coffee table. You’ve created a functional technology hub that eliminates cable clutter. The integrated lighting adds beautiful ambiance to your living space.
Your custom design offers expandability for future features. Over time, you can add more charging zones or connect entertainment systems. This flexibility ensures your creation grows with your needs.
The skills gained through this project will serve you well in future builds. Your finished table stands as a conversation piece that impresses guests while simplifying daily life.