
Did you know that over 60% of homeowners feel their living space lacks a unique, personal touch? This is where creating your own furniture can make a powerful impact. A handcrafted centerpiece can transform the entire feel of a room.
This guide unlocks the rewarding process of building a functional and beautiful piece for your home. You will work with raw materials to create something that is truly yours. The journey from planks to a finished product is incredibly satisfying.
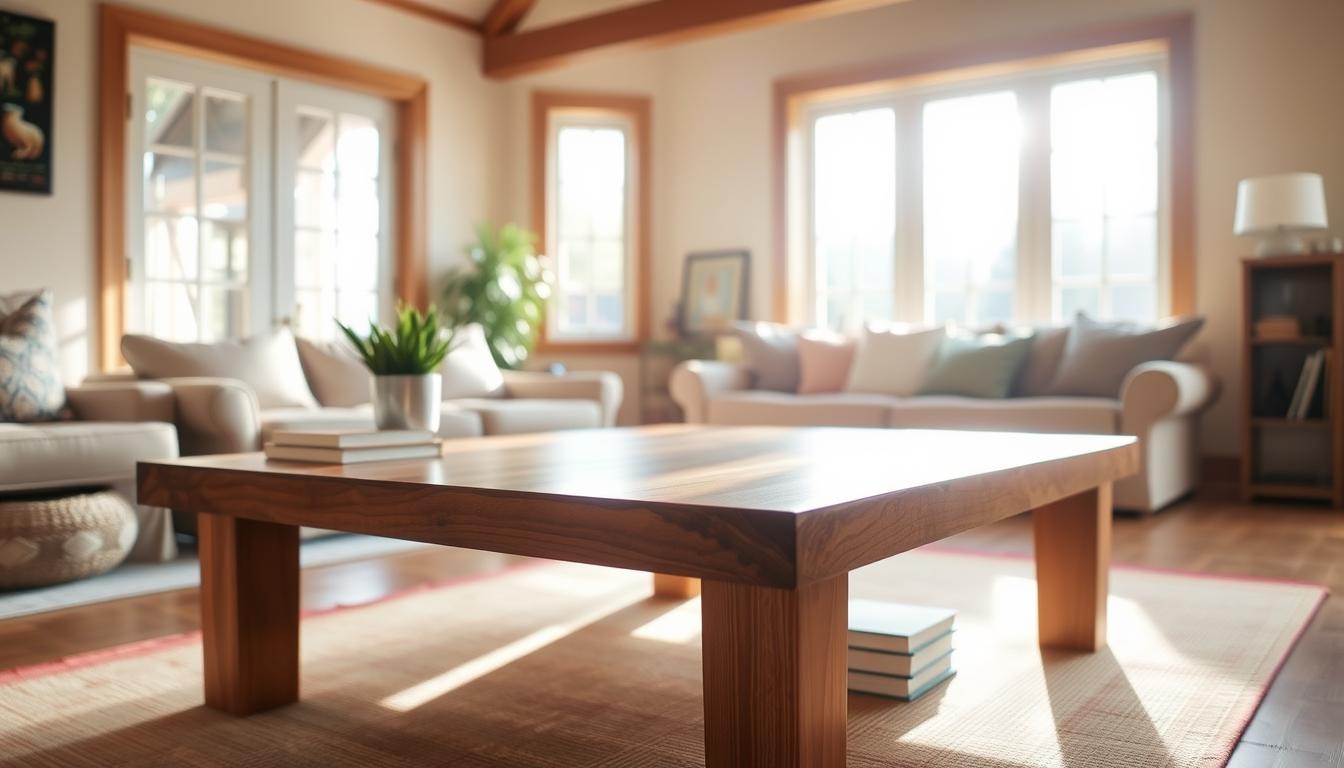
Choosing authentic materials like solid timber ensures your creation will last for generations. This type of furniture gains character over time, telling a story of your skill. You gain complete control over the final design, dimensions, and finish.
This endeavor is an ideal way to develop fundamental skills while producing a practical item. The result will be a testament to your craftsmanship and a fantastic conversation starter. The pride of placing a piece you built yourself in your home is unmatched.
Key Takeaways
- Building your own furniture adds a unique, personal touch to your living space.
- Solid wood offers exceptional durability and natural beauty that improves with age.
- You have full control over the design to perfectly match your home’s aesthetic.
- This project is an excellent opportunity to learn and practice fundamental woodworking skills.
- The satisfaction of creating a functional piece with your own hands far exceeds buying one.
- A systematic approach from planning to finishing ensures professional-looking results.
- You can tailor the project to your available time and current skill level.
Understanding the Project Scope
The journey to a beautiful, functional piece starts with understanding exactly what you want to achieve. Defining your goals early prevents frustration and ensures the final result meets your expectations.
Careful planning turns a complex task into a series of manageable steps. This approach is the best way to guarantee a successful outcome.
Project Overview and Objectives
First, establish clear objectives. What purpose will this piece serve? Do you need simple surface area, or hidden storage for remotes and magazines?
Your design choice is crucial. A simple rectangular shape is a great starting point. More complex plans might include drawers or multiple tiers.
Getting the size right is vital. A standard height falls between 16 and 18 inches. Adjust this to fit your sofa’s height perfectly.

The width and length must match your room’s scale. Measure your space carefully. The goal is a proportional fit that enhances your furniture arrangement.
Skill Level and Time Investment
The required skill level depends entirely on your chosen design. A basic model is accessible with fundamental experience. Intricate features demand more advanced techniques.
Your available time is another key factor. A straightforward project might take a weekend. Elaborate creations can require several days of focused work.
This table helps you gauge the commitment for different approaches:
| Design Complexity | Estimated Skill Level | Approximate Time Needed |
|---|---|---|
| Basic Rectangular | Intermediate | 6-10 hours |
| With Lower Shelf | Intermediate+ | 10-15 hours |
| Including Drawers | Advanced | 15-25 hours |
Measure twice, cut once. This old adage holds profound truth for any construction endeavor. Thoughtful preparation saves materials, time, and effort.
Breaking the work into phases makes the entire process less daunting. This step-by-step method allows you to maintain high quality from start to finish. You can work at a comfortable pace.
Consider what extra things will improve your creation. Decorative trim or specialized joints add strength and visual appeal. Your initial design choices guide every subsequent decision.
Selecting the Right Wood and Materials
Before picking up any tools, your first critical decision involves selecting appropriate wood and supplies. This choice impacts everything from your project’s difficulty to its final appearance and durability.
Comparing Wood Types and Grades
For beginners, softwoods like pine offer excellent workability and affordability. These materials are readily available at most hardware stores.
Hardwoods such as oak and maple provide superior strength and a refined finish. They represent a long-term investment in quality furniture.
Reclaimed wood brings unique character with sustainable appeal. Always inspect these pieces carefully for structural integrity.

Understanding lumber sizing is essential for accurate planning. A 2×6 board actually measures 1.5″ x 5.5″ after milling.
Consider plywood for drawer bottoms and shelf panels. Its dimensional stability makes it practical for certain applications.
Budgeting for Quality and Sustainability
Balance cost with longevity when selecting materials. Invest in better wood for visible surfaces like the top.
Use economical options for internal supports and hidden pieces. This approach maximizes value without compromising quality.
Purchase extra material to account for cutting mistakes and grain matching. Careful planning prevents project delays.
Your material choices directly influence the final look and feel of your creation. Choose wisely for results you’ll enjoy for years.
Essential Tools for Your DIY Coffee Table
Your project’s quality and safety depend heavily on the tools you gather before making the first cut. Assembling the right collection ensures an efficient workflow. This prevents frustrating interruptions and leads to professional-looking results.
Investing in the correct equipment makes the entire process smoother. It also significantly reduces the risk of accidents. Proper preparation is the best way to guarantee success.
Basic Carpentry Tools and Equipment
A circular saw is your primary tool for breaking down large boards. For even greater accuracy on crosscuts, a miter saw is ideal. Always make sure your saw’s blade is sharp for clean, safe cuts.
The pocket hole jig is a game-changer for strong, hidden joints. Your drill becomes indispensable for creating these pocket holes and driving screws. Wood glue reinforces every joint, creating a bond stronger than the wood itself.
Clamps are essential extra hands during assembly. A sander prepares surfaces for a flawless finish. A router with a round-over bit adds a comfortable, professional edge.

Safety Gear and Protection Measures
Safety equipment is non-negotiable for any home workshop. These items protect you from inherent hazards. Never skip this crucial step.
Essential protective gear includes:
- Safety glasses to shield your eyes from debris.
- A dust mask to prevent inhaling fine particles.
- Hearing protection for loud power tools.
- Cut-resistant gloves for handling rough lumber.
This gear allows you to focus on your craft with confidence. Protecting yourself is the most important part of any project.
Step-by-Step Guide to Building Your Coffee Table
Precision in measurement and cutting sets the foundation for a successful furniture project. This phase determines how well all components fit together during final assembly. Careful preparation now prevents frustrating adjustments later.

Measuring, Cutting, and Preparing Boards
Begin by verifying actual lumber dimensions against their nominal sizes. A 2×6 board actually measures 1.5″ x 5.5″ after milling. This difference affects your calculations for the frame and top.
When making cuts, gang multiple boards together for simultaneous cutting. This technique ensures perfectly matched lengths for legs and stretchers. Uniform pieces create a professional-looking result.
Remove rounded edges from boards first using a table saw. Then rip them to specific widths for leg construction. Laminate strips together to form sturdy, square posts.
Assembling the Frame and Supporting Structure
Cut stretchers to precise lengths based on your top size minus desired overhang. Typically, ½” to 1″ on each side creates balanced proportions. This step ensures proper frame dimensions.
Drill pocket holes at consistent depths and angles for hidden joinery. Apply wood glue to all mating surfaces before inserting screws. This combination creates joints stronger than the surrounding material.
Position lower stretchers precisely by marking all four legs identically. Work on a flat, level surface to prevent introducing twists. Verify opposite sides measure identically before glue sets.
Making sure you maintain square alignment during each assembly step prevents cumulative errors. Frequent checks with a carpenter’s square ensure your creation sits perfectly flat.
Classic DIY Coffee Table Builds Using Solid Wood
Mastering a few core techniques is the key to achieving a sturdy and professional-looking final product. This phase focuses on assembly and problem-solving.
Proper execution here ensures your piece will be both beautiful and durable for years to come.
Essential Techniques for a Strong Build
Pocket hole joinery is a fundamental method for creating strong, hidden connections. It simplifies assembly while providing exceptional strength.
Always apply glue to all mating surfaces before driving screws. This combination creates joints stronger than the material itself.
Clamping parts during assembly guarantees tight fits. Check for square after each step by measuring diagonals.
Pre-drilling pilot holes prevents splitting, especially near the ends of boards. This is a simple but critical step.
Solving Typical Assembly Issues
Even with careful planning, you might face minor hurdles. Knowing how to address them saves time and frustration.
If your legs don’t sit flat, measure the gap and trim all four evenly. This is better than rebuilding the entire frame.
Wipe away excess glue immediately with a damp cloth for a clean look. For stability issues, adding a lower shelf often solves the problem.
This table outlines common problems and their solutions:
| Challenge | Likely Cause | Recommended Solution |
|---|---|---|
| Wood Splitting | Screws too close to edge | Pre-drill pilot holes, keep screws 2″ from ends |
| Wobbly Frame | Loose joints or lack of bracing | Re-tighten screws with glue, add a bottom shelf |
| Out-of-Square Assembly | Incorrect diagonal measurements | Measure corner-to-corner; adjust until equal |
Test your pocket hole jig on scrap material first. This ensures your holes are aligned correctly for a smooth build process.
Finishing Techniques and Final Touches
This stage separates amateur results from expert craftsmanship through careful surface preparation. The right finish protects your piece while highlighting its natural beauty.
Proper finishing transforms basic construction into furniture that will last for years. It’s the final step that brings out the character of your materials.
Sanding, Staining, and Sealing Processes
Begin with thorough sanding using 120-grit paper. Always work with the grain to avoid scratches. Progress to 150-grit and finally 220-grit for a smooth surface.
Remove all dust with a vacuum and damp cloth before applying any finish. Test stains on scrap pieces first to ensure the color matches your vision.
Choose your finish based on the desired look and protection level. Apply thin, even coats rather than one heavy application.
| Finish Type | Best For | Application | Durability |
|---|---|---|---|
| Oil Finish | Natural look | Penetrates wood | Medium |
| Polyurethane | High protection | Surface coating | High |
| Wood Stain | Color change | Requires sealer | Medium |
| Lacquer | Professional shine | Spray application | High |
Detailing and Customizing the Look
Pay special attention to edge treatments on the top surface. A routed profile adds visual interest while eliminating sharp corners.
Consider decorative techniques like wood burning or contrasting wood species. These details make your piece uniquely yours.
Allow adequate drying time between coats. Complete curing may take several days before the piece is ready for daily use.
Designing a Durable Frame and Support System
A sturdy frame is the backbone of any quality furniture piece. This foundation determines how well your creation withstands daily use over many years.
Focus on reinforcing joints where the legs meet the apron boards. Add corner blocks or diagonal braces at these stress points for maximum stability.
Reinforcing Joints and Securing Drawers
Construct a support box within the main frame for any drawers. Position side panels carefully, making sure they are perfectly vertical before securing them.
Use pocket holes and glue to attach these components. Apply adhesive to all mating surfaces for the strongest possible bond.
This table shows effective reinforcement methods:
| Reinforcement Type | Strength Benefit | Best Application |
|---|---|---|
| Corner Blocks | High rigidity | Leg-to-apron joints |
| Diagonal Braces | Prevents racking | Large frame sections |
| Steel Brackets | Maximum support | High-stress areas |
Integrating Built-in Storage Solutions
Build drawers from ½” plywood for dimensional stability. Cut sides to precise lengths that account for slide thickness.
Assemble the box with front and back pieces inside the sides. Use glue and brad nails to secure everything together.
Position drawer slides carefully, shimming them to achieve proper height. Test the operation before applying any finish to ensure smooth movement.
Optimizing Your Workspace and Safety Practices
The quality of your final piece is deeply influenced by the environment in which you create it. A well-organized and safe workspace is not a luxury; it is a fundamental requirement for efficient and successful projects. Taking the time to set up your area properly pays dividends in accuracy and peace of mind.
Setting Up a Clean, Efficient Work Area
Choose a spacious place like a garage or a well-ventilated room. Ensure you have enough room to move around large materials comfortably. A sturdy workbench or sawhorses with a flat top provide a reliable foundation.
Good lighting is essential. Supplement natural light with bright LED lamps to eliminate shadows on your work surface. This makes precise cuts and measurements much easier.
Keep your tools organized and within easy reach. Designate a specific place for each item on a pegboard or in a mobile cart. A clean workspace, free of sawdust and clutter, prevents accidents and ensures accurate work.
Implementing Best Practices for Tool Use
Safety extends beyond wearing protective gear. It involves a systematic way of working. Always measure twice and cut once to avoid costly mistakes.
Making sure you have adequate time for each session prevents rushing. Quality furniture projects require patience. Plan your workflow to batch similar tasks, like doing all cutting before starting assembly.
Between projects, perform routine maintenance on your tools. Sharp blades and well-lubricated parts are safer and more effective. This careful approach ensures your home workshop remains a productive and safe place for all your future endeavors.
Conclusion
Your completed piece now stands as a testament to your craftsmanship and dedication. This furniture project has guided you through essential techniques that transform raw materials into lasting creations.
The skills you developed—precise measuring, strong joinery, and professional finishing—serve as a foundation for future endeavors. Each careful step ensures your work withstands daily use while showcasing personal style.
Your handcrafted centerpiece brings unique character to your living space. It represents more than functional furniture; it embodies the satisfaction of creating something truly your own.
This experience builds confidence to tackle more complex projects. The knowledge gained here opens doors to endless possibilities in custom furniture design for any room in your home.