
Surprising fact: nearly 60% of hosts say a fitted cover makes guests notice the setup first, not the food.
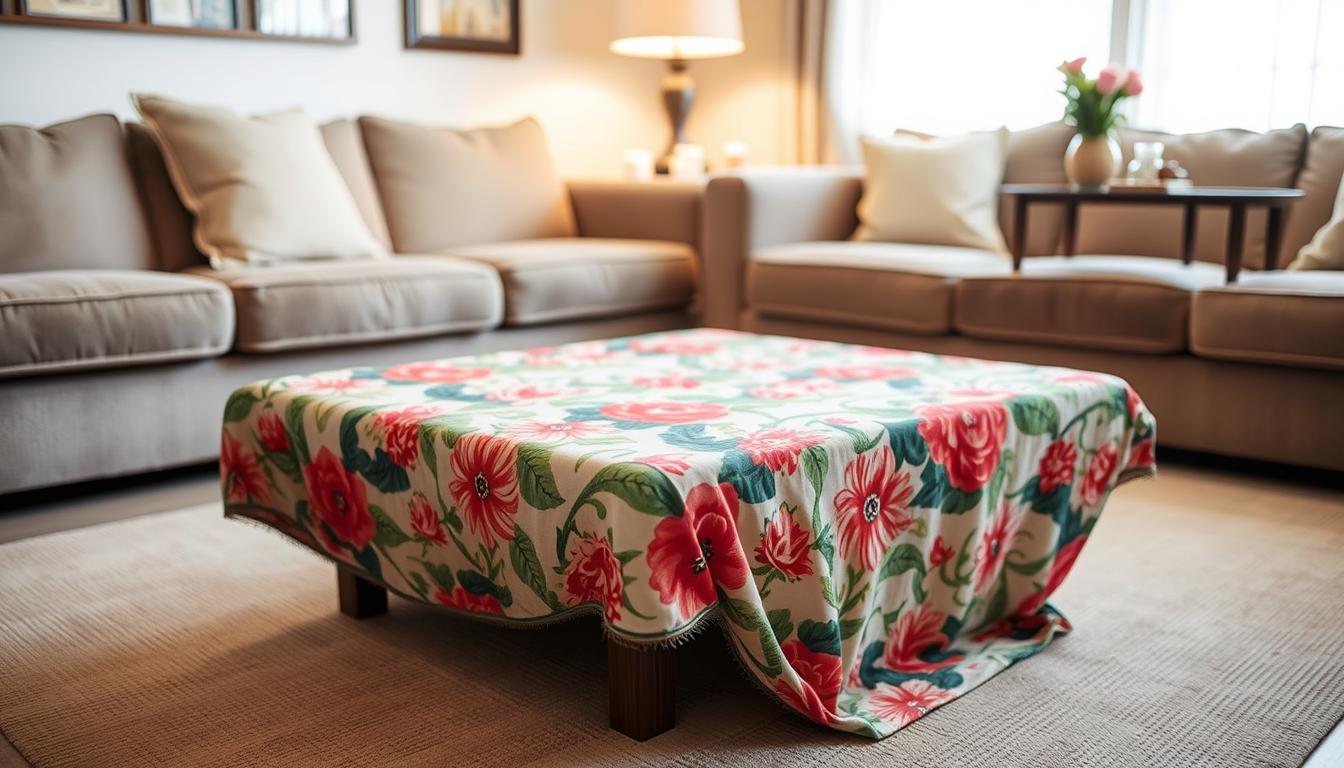
You can plan a snug tablecloth that stays put by focusing on precise measurements and a bit of elastic. Start with the right size and pick fabric based on traffic and spills. Durable cotton, linen, and polyester work well; vinyl gives wipe-clean protection for busy events.
Measuring matters: translate the tabletop diameter or rectangle into cut pieces and drops that sew together cleanly. Use simple stitch settings, neat hems, and either a casing or zigzag elastic to anchor the cover.
The process lifts your dining presentation and prevents slipping, bunching, and uneven drops. Small finishing touches — contrasting borders or decorative stitches — create a cohesive look that matches your room.
Key Takeaways
- Measure the table carefully and calculate the correct size and drop.
- Choose fabric for durability or wipe-clean convenience based on use.
- Select an elastic method that keeps a fitted tablecloth anchored.
- Follow stitch length and hemming tips for clean, professional edges.
- Style with borders or stitches to match your dining room palette.
What You’ll Achieve Today and Why Cocktail Table Covers Matter
A fitted cover transforms a simple surface into a crisp focal point that resists slips and constant adjustment.
Accurate measurements are the foundation. You’ll measure the tabletop diameter or width, confirm height, and set the desired drop. Getting length and drop right keeps the cloth even all the way around the table.
In this guide you gain a custom, tailored look that stays put. A neat tablecloth looks polished for receptions and pop-ups and makes dining setups feel intentional. You’ll also pick the best fabric and finish for traffic and lighting.
| Objective | Benefit | Quick tip |
|---|---|---|
| Correct size | Even drop around the table | Measure twice, cut once |
| Right length | No dragging or exposed base | Match venue height |
| Appropriate fabric | Easy care and less re-adjusting | Choose stain-resistant for heavy use |
- You get a cover that resists sliding and bunching on every side.
- Precise work saves time and keeps a crisp presentation all night.
Project Planning: Choose Your Style, Fit, and Fabric Finish
Start by picking the overall look you want—sleek, fitted, or gathered—so every decision after that supports the final effect.
Selecting a tailored, elasticized, or skirted look
You select between a smooth, tailored top, an elasticized fitted edge, or a skirted design with gathers. Each silhouette affects how the fabric hangs and what finishes you need.
Pedestal bases work well with elasticized or tailored tops. Skirted versions cover all sides and hide the base for a formal event.
When to choose cotton, linen, polyester, vinyl, or laminated fabrics
Cotton and linen give natural texture and breathe well for indoor service when pressing is feasible. Polyester blends give strength and wrinkle resistance for frequent setups.
Vinyl, oilcloth, and laminated fabric are best where spills matter because they wipe clean. For outdoors, select Sunbrella or treated polyester for UV and weather resistance.

| Look | Best fabric | Key benefit | Notes on width & sides |
|---|---|---|---|
| Tailored top | cotton / linen | clean, refined drape | Choose wider fabric to avoid visible seams on sides |
| Elasticized fit | polyester blends | quick setup, wrinkle resistant | Measure circumference for proper size and casing |
| Skirted design | laminated cotton / vinyl | full coverage, easy cleaning | Plan panel width for even gathers around all sides |
| Outdoor-ready | Sunbrella / treated polyester | UV and moisture protection | Pick color that masks stains; check roll width |
Tools and Materials You Need to Get Started
A well-organized kit of tools makes every step from measuring to finishing faster and neater. Lay out supplies before you begin so you won’t stop mid-project.
Basic supplies for measuring and cutting
You’ll need quality fabric yardage, a reliable sewing machine, sharp scissors, a measuring tape, and strong thread. Keep a few pins or clips nearby and mark measurements in inches with tailor’s chalk or a washable pen.
Notions, elastic, and presser feet
Use 1/4- to 3/4-inch elastic for fitted rims and a safety pin or bodkin to pull the elastic through casings. Prep a narrow hem foot or edge-stitch foot for cleaner topstitching and even seam allowances.
- Stabilize curved pieces with interfacing or stay tape.
- Confirm iron settings for the fabric to protect edges and avoid shine.
- Organize small parts in trays so ends and pins don’t get lost.
| Item | Why it matters | Quick tip |
|---|---|---|
| fabric | Determines drape and cleanability | Match fiber to iron setting |
| sewing machine | Delivers consistent stitches and speed | Feed long panels evenly through the machine |
| elastic & foot | Secures a snug rim and neat topstitching | Test elastic length on a scrap piece |
“Pressing each seam as you go is the fastest way to a professional finish.”
Optional: Apply a waterproofing spray to cotton or linen per manufacturer instructions when you want extra stain resistance without changing materials.
Measure Once, Cut Once: Accurate Tabletop, Height, and Drop
Start by taking clear measurements of the top and height so the cover hangs exactly where you want it.
Measure the tabletop carefully. For round tables, record the diameter. For square or rectangular pieces, note the length and width in inches. Write each value on a sheet so nothing is lost.
Decide the drop you need. Standing events often use a longer drop; seated service may stop above the lap. Record the table height and test whether a floor-length size will work for traffic.

Allowances and quick formulas
- Seam and hem: add 1/4–3/4 inch per edge for hems and any casing depth for elastic.
- Round formula: cut size = diameter + 2 × drop + hem allowance.
- Elastic: measure length around the perimeter; cut elastic slightly shorter for a snug fit.
| What you record | Why it matters | Tip |
|---|---|---|
| Diameter / width / length | Base size for cutting | Measure twice, write once |
| Height & drop | Controls final hang | Check accessibility |
| Seam & casing allowance | Prevents tight hems | Mark cardinal points for even drop |
Final step: double-check every number before you cut. Note any hardware or tabletop features that affect fit. A tidy measurement sheet saves fabric and time and delivers the snug, even tablecloth you planned.
DIY Cocktail Table Covers: How To Sew And Style Your Own
A simple sequence—measure, cut, assemble, finish—keeps the work efficient and the result tidy.
Start with a clear plan: lay out panels and mark seam lines. Baste or pin-fit the top to check grain alignment and edge placement before permanent stitching.
Press each seam as you go. Steam sets curves and gives a crisp top edge that lies flat on the table.
Topstitch near stress points to reinforce corners and keep the full surface smooth. Leave openings if you will insert elastic, then add the elastic and close the casing.
Test the fit on the actual table. Smooth the drop, adjust tension, and confirm the hem sits parallel to the floor. Gently tug from several directions to verify the cover does not migrate during service.
Style the finished piece with coordinated napkins or a narrow contrasting border for a framed look.
| Action | What to check | Quick benefit | When |
|---|---|---|---|
| Pin-fit top | Grain and edge alignment | Prevents miscuts | Before final stitch |
| Press seams | Curves and hems | Crisp, flat top | After each seam |
| Elastic & test | Tension and hold | Secure, non-slip tablecloth | Final fitting |
Finish notes: add a care tag with fiber content and washing directions, and record final measurements. That makes future remakes or scaling much faster.
Fabric Math Made Easy: Yardage, Width, and Hem Allowances
Start by converting your tabletop measurements into a clear cut plan for yardage and seams. This prevents wasted fabric and keeps the final size accurate.
Round tops: add the tabletop diameter plus twice the desired drop and include hem allowance. For example, a 36-inch tabletop with an 18-inch drop needs a 72-inch square (36 + 2×18). Mark that number in inches before you cut.
Square and rectangular tops: add twice the drop to both width and length, then add seam and hem allowances. That gives you the final cut dimensions and the yardage you must buy.

When your fabric roll is too narrow
Audit your fabric width. If the required size exceeds the roll, seam two lengths right sides together with a 1/2-inch stitch. Press the seam open and trim the joined piece square before marking the circle or cutting the final shape.
- Estimate yardage by dividing the required cut by the roll width to reduce waste.
- Factor hem depth (1/4–3/4 inch) into totals so the finished drop remains accurate.
- Label grainlines and account for pattern repeats when planning seams.
“Set aside a scrap for testing stitch length and pressing temperature before you cut the main piece.”
| Need | Why | Quick tip |
|---|---|---|
| final cut size | determines yardage | add hem & seam allowances |
| fabric width | decides if seaming is needed | plan seams along less visible grain |
| pattern repeat | affects layout | add extra length for match |
Create the Perfect Circle Top: Cut and Prep Your Tabletop Piece
Cutting a true circle starts with a neatly folded square and a steady arc drawn from the folded corner. This method gives a smooth edge and keeps the finished top balanced on the table.
Fold-and-mark circle method for a smooth edge
Fold the joined square twice with right sides together so the fabric is quartered. Align raw edges carefully for an accurate center point.
Place a tape measure at the folded corner and mark half the finished diameter in a gentle arc. Use a curved ruler or a steady hand to draw a smooth guide before you cut fabric.
Cut along that curve for a clean circle. Cutting precisely helps prevent flat spots that cause ripples when you hem the edge.
Pressing and stabilizing the edges before hemming
Press the circle flat to remove creases and stabilize bias sections. If the fabric ravels, staystitch close to the raw edge to reduce distortion.
Use a tailor’s ham and light steam to ease fullness, then fold the hem: 1/4 inch first, then 3/4 inch, pinning at regular intervals. Test stitch and pressing on a scrap so the final stitch does not shine the fabric.
- Inspect the edges for symmetry so the tabletop top sits even.
- Save offcuts for swatches or bias binding.
Make the Skirt: Gathered or Straight Panels for a Clean Drop
Start the skirt by cutting panels to the final height plus the hem allowance. Press the cut edges and mark where the top will join the top piece so the fit is predictable.

Setting a long stitch for gathering with your sewing machine
Set the longest stitch setting (often 4) and sew two parallel gathering lines about 1/4 inches apart. Do not backstitch; leave long thread tails so you can pull by hand.
Distributing gathers evenly around corners and sides
Gather from both ends toward the center, adjusting fullness until the panel matches the table perimeter with a slight overlap. Pin at short intervals and ease fullness so the skirt hangs evenly on all sides.
- Hem the lower edge before attaching to avoid bulk.
- Switch to a suitable presser foot to feed gathered fabric smoothly.
- Support the panel as it feeds through the machine so the stitch line remains even.
“Gather in stages and pin often; it saves time and gives a cleaner fall.”
Hemming Like a Pro: Narrow, Double-Fold, and Curved Hems
Clean hems make the final impression. Use a narrow double-fold to protect the raw edge and keep a smooth fall around circular pieces. Small, steady actions prevent waves and give the tablecloth a crisp look.
Double-fold technique and measurements
Fold the raw edge under 1/4 inch, press, then fold again 3/4 inch and press for a compact hem. Pin and stitch close to the inner fold for a tidy finish. This double-fold balances durability with a discreet profile on curved tops.
Pressing curves and setting sections
Work small segments when pressing tight radii. Set each section with steam and let it cool on the board before moving on. Clip or ease the allowance at tight points so the edges lie flat without pleats.
- Keep a consistent stitch distance from the fold for uniform length around the perimeter.
- Use an edge-stitch foot for a straight line and test stitch on scrap fabric first.
- Backstitch discreetly at the ends or tie off threads for an invisible finish.
“Steam, press, and repeat small sections — that single step prevents puckers.”
Add Elastic for a Snug, Fitted Cover That Stays Put
A snug rim comes from choosing the right elastic method and fitting it with care.
Choose a casing channel if you want future adjustments. Fold the hem to form a neat channel, then topstitch a parallel line for a smooth passage.
Alternatively, use a zigzag method for speed: stretch the elastic and sew it directly to the raw edge with a wide zigzag. This way saves time and holds well for events.

Sewing a casing channel vs. zigzagging elastic
The casing hides elastic and reduces bulk. It also makes laundering easier. Zigzagging is a quick step if you need fast setup and less material handling.
Measuring perimeter, joining ends, and testing the fit
First, measure length around the perimeter and cut elastic slightly shorter than that measure length. Overlap the ends by about 1 inch, then secure with a reinforced zigzag stitch.
Use a safety pin or bodkin to guide the elastic through the casing without twisting. Apply an edge-stitch foot on your sewing machine for an even channel width. Keep seam allowances smooth so the casing won’t catch.
| Method | Speed | Adjustability | Best for |
|---|---|---|---|
| Casing channel | Moderate | High — easy to shorten | Frequent laundering |
| Zigzag elastic | Fast | Low — permanent hold | Quick events |
| Hybrid (partial casing) | Moderate | Medium | Thicker fabric |
After joining the elastic ends, distribute gathers evenly around the table or tabletop. Test the fit on the actual tablecloth and check tension at the edges.
“Adjust elastic length if the fabric stretches over time; a snug but comfortable fit is the goal.”
Final step: reinforce stress points with bar tacks and steam the edge lightly to set the shape without over-stretching the elastic. This way your fitted cover holds its size and looks tidy in service.
Vinyl and Waterproof Options for Parties and Outdoor Use
Vinyl, oilcloth, and coated fabrics give a low-maintenance surface that stands up to spills, wind, and UV exposure. These materials do not fray, so you can cut and finish edges differently than woven fabric. Use a sharp rotary cutter for clean lines and minimal drag.
Cutting and hemming vinyl or oilcloth without fray
Cut with a fresh rotary blade and a straight edge. Skip overcasting; instead, turn the edge and secure it with double-sided tape or contact cement before topstitching. Use a Teflon or non-stick presser foot and lengthen the stitch so the material does not perforate or stick.
Applying waterproof sprays and maintenance considerations
For natural fabric covers, apply a waterproof spray following the product directions and allow full cure time. Reapply treatments periodically, especially for outdoor use where sun and weather wear coatings down.
Storage and care: wipe spills promptly with a soft cloth, avoid abrasive cleaners, and store stiffer materials rolled to prevent creases. Test sprays or adhesives on a scrap to confirm no color change or reaction.
| Material | Edge finish | Outdoor durability | Best use |
|---|---|---|---|
| Vinyl | Turn & tape or glue | High (waterproof) | Quick events, wipe-clean needs |
| Oilcloth | Fold & adhesive | Moderate | Casual outdoor service |
| Sunbrella / treated polyester | Sewn hem, sealed seams | Very high (UV resistant) | Long-term outdoor setups |
| Cotton / linen (sprayed) | Sewn hem after treatment | Variable — reapply spray | Indoor events with occasional spills |
“Test a corner before full application to ensure adhesives or sprays do not discolor or react with the fabric.”
Rectangular and Square Cocktail Tables: Pattern and Corners
Work from a clean rectangle and match panels to the tabletop so corners sit flat and neat.
Drafting the panel: measure length, width, and height. Add twice the drop and hem allowance to both dimensions so the sides hang evenly. Cut panels with these numbers and mark corner points before you join any seams.
Choosing corner shape: decide whether to keep square corners or soften them with a small radius. Square corners look formal but can bulk at seams. Slightly rounded corners reduce wear and prevent snagging during service.
Use a template to mark identical radii on each corner so stitch lines mirror one another. For square corners, trim seam allowances at the point and press seams open to avoid a bulky node that will distort the tablecloth edge.
Pin strategy: pin generously at each corner to control fabric shift through turns. Check that the tabletop grain aligns with the panel grain so the cloth hangs straight and does not twist in use.
| Step | What to check | Quick tip |
|---|---|---|
| Draft rectangle | Length, width, drop | Add twice the drop + hem |
| Mark corners | Radius or square | Use a template for consistency |
| Corner finish | Seam allowance & pressing | Trim & press open for square |
| Fit test | Grain alignment & pinning | Test on the table and refine the curve |
“Pin densely at corners and do a final press to lock in geometry so corners keep a crisp shape in service.”
Stitching Essentials: Thread, Stitch Length, and Machine Tips
A neat seam depends on matching needle, thread, and tension for the fabric you picked. Test settings on a scrap before you sew any visible seam. Small trials save time and give a professional finish.
Choosing thread and needle for cotton, linen, and synthetic fabrics
Match fiber types: use polyester thread for most projects, or choose cotton thread for pure linen or cotton pieces when you want a traditional look. Select needles by weave: a universal needle for cotton, a sharper Microtex for dense polyester, and a non-stick or leather needle for coated surfaces.
Using the right presser foot for smooth, even stitches
Fit the proper foot before you start. An edge-stitch foot keeps topstitch lines true. A non-stick foot prevents drag on coated materials. Keep the machine clean and change needles often for steady feed and stitch quality.
| Material | Needle | Recommended stitch length | Recommended foot |
|---|---|---|---|
| cotton | Universal 80/12 | 2.2–2.5 mm | Edge-stitch |
| linen | Universal 90/14 | 2.0–2.5 mm | Narrow hem |
| polyester / synthetic | Microtex 70/10–80/12 | 2.2–3.0 mm | Edge-stitch or non-stick |
| vinyl / coated | Non-stick / leather 90/14 | 3.0–3.5 mm | Non-stick |
“Always stabilize bias or stretchy edges with stay stitching before final assembly.”
Final checks: balance upper tension and bobbin on scraps, line up stitches with the grain so the piece hangs true on the table, and log the successful setting for future projects. That habit speeds repeat builds of the same tablecloth and keeps results consistent.
Style and Color: Elevate Your Table Setting and Room Decor
A thoughtful palette turns a plain cover into a purposeful centerpiece that ties the room together.
Use contrast sparingly. Add a narrow border or a darker hem at the top edge to frame glassware and centerpieces. A thin line can act as a visual charger and focus attention.
Mix fabrics for depth: pair a matte top with a lustrous skirt or a printed piece with a neutral tablecloth. That contrast adds texture without overwhelming the dining sightline.
Choose tones for function as well as form. Darker shades hide stains; lighter color brightens small spaces and reads well in photos. Keep scale in mind: small prints suit intimate settings, bolder motifs work in larger rooms.
- Use decorative stitches along borders for subtle texture under ambient lighting.
- Standardize a few signature looks so setups are repeatable and fast for staff.
- Keep a swatch library for quick approvals and matched thread choices.
“Trim sparingly — a little detail goes farther than a lot of clutter.”
Quick note: this guide helps you balance color, fabric, and proportion so each tablecloth piece enhances the dining scene while staying practical for service.
Troubleshooting Fit, Corners, and Waves at the Edge
When a cover sits loose or shows waves at the edges, a targeted check often corrects it without rebuilding the whole piece.
Start by testing the fit on the table and note where fabric pulls, sags, or flares. Shorten elastic a little if the rim feels loose, then redistribute fullness evenly around the edge.
Re-measure panel lengths and confirm hem depth on every side when drops look uneven. Small mismatches in seam allowance or cut length often cause visible skew at the side.
- Reduce ripples in curved hems by easing and pressing small segments; clip allowances on tight curves as needed.
- Refine corners by trimming bulk, pressing seams open, and topstitching to lock geometry.
- Address bias stretch with early stay stitching and a final steam to reset the shape.
- Reinforce stress points with bar tacks rather than repeated machine passes that stiffen the fabric.
| Problem | Likely cause | Quick fix |
|---|---|---|
| Loose fit | Elastic length too long | Shorten elastic, redistribute fullness |
| Uneven drops | Inconsistent panel length or hem | Re-measure, adjust seam allowances |
| Wavy hem | Too much fullness or bias stretch | Ease, clip curves, press in small sections |
“Log the issue and the remedy in your guide so future runs avoid the same mistake.”
Final step: re-press the finished tablecloth thoroughly and test on the actual table. Confirm length and size against your notes and make one last tension tweak if needed.
Care, Cleaning, and Storage to Extend Fabric Life
Good laundering and storage habits protect fiber, finish, and elastic performance. Spot clean spills quickly with a mild detergent so stains do not set into the fabric. For vinyl and oilcloth, wipe with a damp cloth and mild soap; avoid abrasive cleaners that harm the finish.
Machine and hand washing guidance: wash cotton tablecloths on cool, tumble low or air dry. Hand wash linen in cold water and air dry to preserve texture. Use a gentle warm cycle for polyester blends and skip high heat that can glaze or shrink fibers.
Press cotton with steam; use medium heat for linen and a pressing cloth to prevent shine. Mend loose thread ends promptly and inspect elastic recovery on fitted pieces so the cover keeps a snug fit.
Folding, hanging, and on-site tips
Fold along seams, tuck tissue between layers, and keep storage areas cool and dry. Hang floor-length event linens when possible to avoid fold memory. Use clips outdoors to secure a tablecloth without stretching it.
“Label bins by size and fiber so staff can pull the right piece quickly.”
| Action | Why it helps | Quick tip |
|---|---|---|
| Spot clean | Prevents set-in stains | Use mild detergent |
| Hand wash linen | Protects weave | Air dry flat |
| Store clean/dry | Prevents mildew | Keep out of sunlight |
Conclusion
Wrap up with a quick fit test and a final press for a crisp, reliable finish. This guide gives you a clear step that leads to consistent, professional tablecloth results. Check the size and tension, then confirm the fit on the actual table before service.
Remember: choose fabric that balances look and maintenance, apply elastic and hems that hold under traffic, and keep waterproof options for messy events. A strong.
Keep notes on measurements and settings so you can repeat successful runs. With careful sewing, accurate math, and regular care, your pieces will look polished and last through many dining events.