

Surprising fact: more than half of practical weekend furniture projects finish for under $50 when you reuse pallets or scrap lumber, making a living room centerpiece both affordable and personal.
By Sunday night, you’ll have a clear plan to make a coffee table that fits your room and style without complex joinery. Simple builds — pallet stacks on casters, crate cubbies, tire-and-rope coastal designs, or hairpin legs with a wood top — prove a great piece doesn’t need heavy tools.
Most plan sets aim for about 16–18 inches high for comfortable reach from a sofa. You’ll compare approachable table ideas by difficulty and payoff, learn quick finishes that last, and see moving-friendly options like pipe frames that disassemble for relocation.
Key Takeaways
- Fast results: Weekend projects can yield a polished coffee table by Sunday.
- Budget-friendly builds often cost under $50 using reclaimed materials.
- Comfortable heights sit around 16–18 inches for most living rooms.
- Choose projects by tools on hand and desired style payoff.
- Small design choices, like casters or tapered legs, raise the look easily.
- Safety and finish curing matter for durability and long-term use.
Kickstart Your Weekend Build: Scope, Style, and Tools
A focused weekend project should let you cut, assemble, and finish a practical living-room centerpiece without complex joinery. Pick a simple plan so finishing coats and cure windows fit the available time.

Beginner scope
Choose builds that finish from Friday evening to Sunday. Pallet coffee table options often cost under $50. A hairpin-leg table may take under an hour once the top is ready.
Essential tools
- Hand tools first: tape measure, square, screwdriver, handsaw, drill/driver, clamps.
- Optional power tools: sander or miter saw to speed sanding and cutting.
Time and budget cues
Map a simple step plan: pre-cut on Friday, assemble Saturday, finish Sunday. Favor pipe frames or screwed assemblies for easy disassembly if you move often.
Pro tip: size your table to about two-thirds of a sofa for balanced scale.
Quick Wins: Minimal-Tool Coffee Table Ideas for Fast Results
Minimal tools and smart parts make it simple to create a high-impact table in little time.
Hairpin leg minimalist table with a simple wood top
Attach hairpin legs to a prepped wood top for a sleek coffee table that looks designer. Use accurate plate layout and secure screws so the legs hold tight.
Marble contact paper makeover on a basic thrifted table
Prep the surface smooth, apply marble contact paper carefully, and seal edges with clear polyurethane to resist wear. This update costs under $20 and changes the look instantly.
Repurposed trunk or bench as an instant centerpiece
Lightly sand a sturdy trunk or bench, add stain or paint, and fit felt pads or low-profile casters for mobility. Pair two small side pieces for a wider surface when needed.
| Option | Tools Needed | Estimated Time | Best Top Choice |
|---|---|---|---|
| Hairpin legs | Drill, screwdriver, tape measure | Under 1 hour | Butcher block or sanded pine |
| Marble contact | Sandpaper, utility knife, brush for sealant | 1–2 hours (including seal) | Thrifted laminate or MDF |
| Repurposed trunk | Sander, brush, optional casters | 1–3 hours | Stained wood or painted surface |

Salvaged and Upcycled: Low-Cost Builds with Big Style
Using pallets, crates, a tire, or a reclaimed door turns found pieces into distinctive furniture that fits your room and budget.
Rustic pallet coffee table with casters and stain
Sand and stack one or two pallets to reach the desired height. Fasten layers, trim uneven ends, and add industrial locking casters. Finish with a mid-brown stain to bring out the wood grain while keeping the farmhouse look.
Vintage crate storage table with outward-facing cubbies
Arrange vintage crates with openings facing out to create handy cubbies. Glue or screw them to a base board and top with a smooth panel or painted finish for a neat, functional piece.
Tire wrapped in sisal rope for coastal texture
Attach circular plywood disks inside and out, then wrap tightly with natural sisal rope. Use strong glue and clamp as you coil to ensure a durable, tactile surface that adds coastal charm.
Repurposed door tabletop with new legs for character
Strip hardware, sand the door, and preserve panel details like mail slots. Fit new legs that match your design and add a clear coat for protection. Consider a lower shelf or hidden glides for extra function.
Tip: source pallets and crates locally and invest in fasteners, casters, rope, and finish for a polished result that keeps costs low.
Modern-Industrial Looks: Metal Meets Wood
Modern-industrial styling pairs tough metal frames with warm wood tops to create a striking coffee table that fits a contemporary living room.

Industrial pipe frame with reclaimed wood and shelf
Threaded plumbing pipe makes a sturdy base that disassembles for moves. Thread pipes into a rectangular frame, add flanges for legs, and fit reclaimed boards on top.
Add a lower shelf between the pipe rails for books or baskets. Sand and seal the wood so the surface resists spills and shows grain.
Concrete slab and wood combo
Cast a concrete top in a melamine mold, screed for flatness, and tint if desired. Seal after cure to guard against stains and scratches.
Pair the slab with a slim metal base and a warm wood apron to balance the cold concrete look.
Floating tempered glass on an open base
Use tempered glass with clear bumpers on a clean metal or wood base for an airy feel. A floating top keeps the room visually light while protecting the surface.
Practical tips: pre-drill and countersink fasteners for a flush finish, felt under flanges to protect floors, and schedule final leveling in a single session.
Farmhouse and Rustic Charm for a Cozy Living Room
An X-frame base paired with a solid wood top brings classic farmhouse presence and practical storage into your living room.

Farmhouse X-frame base with solid wood top and storage shelf
Build an X-frame using 2x stock and pocket screws for clean joinery. Aim for 40–48 inches long and about 18 inches high for balanced scale.
Fit a full-length solid wood shelf beneath the top for blankets and books. Round over edges lightly for a handcrafted feel.
Slatted and stylish midcentury nod with warm stain
Borrow a slatted motif for the shelf or top to nod toward midcentury design. Space slats evenly and apply a warm stain that highlights grain.
Sweet-and-simple farmhouse plan from standard lumber
One 2x3x10 and three 2x4x8 boards make a compact, affordable project when you use common cuts and a clear cut list.
Tip: choose solid wood for the top and shelf, seal with a matte finish, and add concealed levelers to keep the piece steady on rugs or hardwood floors.
Smart Storage Solutions: Tables That Tidy Your Space
A well-planned storage coffee table makes daily cleanup effortless and elegant.
Choose a design that hides clutter without adding bulk. Focus on a sturdy frame, practical compartments, and finishes that stand up to wear.

Ottoman with a hinged, padded top
Build a box frame from wood, attach a continuous hinge, then glue foam and fabric to the lid. Use stain-resistant fabric for daily durability.
Reinforce corners and add hidden legs or low glides so the piece looks light in your living room.
Hidden flip-top that clears the surface fast
Design a flip-top table around a 48×24-inch plan if you want a taller profile. Fit soft-close hinges and interior dividers to keep remotes, chargers, and books organized.
Modular crate benches for mobile storage
Line up cushioned crate benches with casters and connector brackets. Each unit moves alone but locks in place when you push them together.
| Style | Key Feature | Materials | Best Use |
|---|---|---|---|
| Hinged Ottoman | Padded lid, hidden storage | Wood frame, foam, fabric | Soft top for feet and trays |
| Flip-Top Table | Soft-close compartments | Plywood top, continuous hinge | Quick surface clearing |
| Modular Crates | Individual benches on casters | Reclaimed wood, connectors | Flexible, portable storage |
Tip: plan interior dividers and ventilation gaps so stored items stay fresh and easy to find.
Design-Forward Centerpieces: Shapes, Lines, and Live Edges
Let the top’s form guide the base: a flowing edge asks for quiet supports, while a geometric top benefits from contrast. Thoughtful proportion and negative space help a central piece breathe in your living room.

Live-edge slab on minimalist metal legs
Showcase the grain: sand the wood surface smooth but keep the organic contour. Seal with polyurethane so the surface invites touch yet resists rings.
Pair the slab with thin metal legs so the top remains the star. Add felt bumpers and light cross-bracing for stability without clutter.
Mid-century inspired with tapered, splayed legs
Splay and taper the legs to lift the top visually. Fit a narrow lower shelf for function that stays visually light and keeps the focus on the top.
Hexagon modular units for flexible layouts
Make hex modules that cluster into a large coffee table or scatter as small side surfaces. Some modules flip to reveal a hidden shelf, adding clever storage without bulk.
| Style | Top | Base | Best Use |
|---|---|---|---|
| Live-edge slab | Solid wood slab, sealed | Slim metal legs | Center-of-room sculptural piece |
| Mid-century | Rectangular wood top | Tapered splayed legs + low shelf | Warm, functional living room look |
| Hexagon modular | Smaller wood panels | Replaceable legs or blocks | Flexible grouping for events |
Tip: choose walnut for depth or oak for pronounced grain; swap legs later to evolve the table design.
Small-Space Saviors: Flexible Tables for Tight Rooms
Lean profiles and stackable geometry keep compact rooms uncluttered while offering flexible surface area.

Nesting sets give you extra surface when guests arrive and tuck away to free floor space. A graduated set slides together so the visual weight stays light in a small living room.
Nesting set that tucks away after guests leave
Make three sizes that nest smoothly. Use matching legs and thin tops so the pieces look intentional when stacked or spread.
- Graduated footprints that slide together to free floor space.
- Contrasting finishes or complementary tones for subtle interest.
- Thin profiles and protective feet to avoid scuffs.
Pair of side surfaces used together as one coffee table
Push two sturdy side pieces together to act as a single centerpiece for trays and remotes. Then split them for extra seating areas or gaming zones.
Tip: scale the tops so they meet daily needs but stay compact for tight rooms. Add light cross-bracing if needed for stability.
Outdoor-Ready Builds: Patio and Porch Coffee Tables
Good outdoor designs let water pass through the top while protecting every exposed surface from moisture. Plan for drainage, weather-rated hardware, and a finish that eases seasonal upkeep.
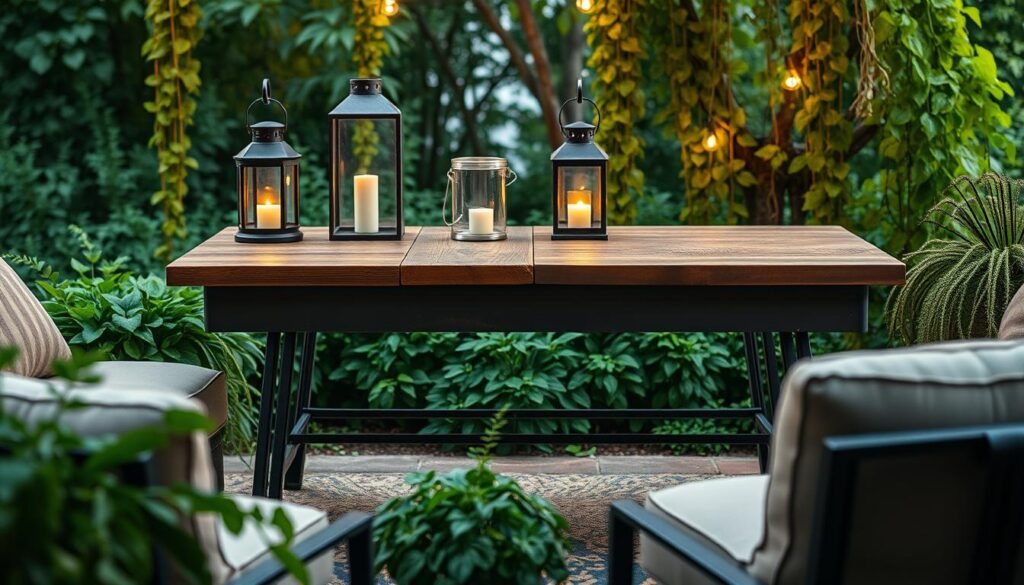
Square patio table with slatted top for drainage
Build a square patio coffee table with evenly spaced slats so rain drains quickly. Ease edges to reduce splinters and test the surface for wobble on pavers.
Choose rot-resistant materials or exterior-grade lumber. Fasten the slatted top to a stout base using coated screws or stainless fasteners to avoid corrosion.
Compact outdoor table sealed with spar varnish
For a small porch, pick a compact footprint that leaves clear walkways. Stencil a plywood round on a metal base for personality, then seal every surface—including feet—with thin coats of spar varnish.
- Protect all contact points: varnish or epoxy on the legs and feet to block moisture wicking.
- Hardware: use exterior-rated screws and outdoor adhesives for longevity.
- Care: clean, light sand, and recoat seasonally to keep the finish fresh.
Tip: add glides or patio wheels to move the table for cleaning and gatherings without lifting.
Finishes That Elevate: Paint, Stain, and Protective Coats
A carefully planned finish routine is the step that separates a good tabletop from a great one. Match the finish to the wood species and the intended design so the final look feels cohesive in your living area.
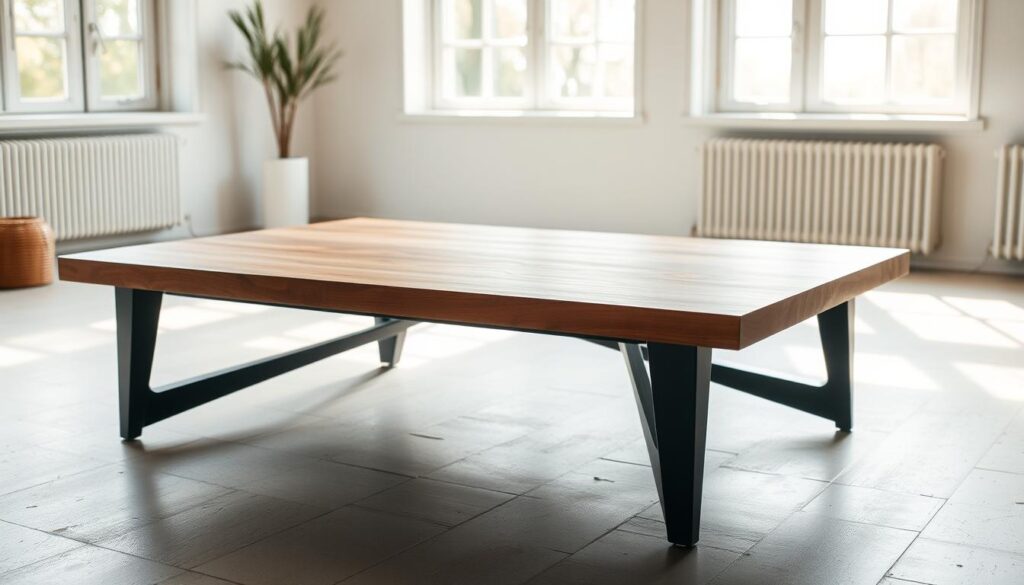
Choosing paint versus stain
Stain shows grain and suits oak, walnut, and other open-grain species. Apply in controlled coats, wipe evenly, and test colors on offcuts.
Paint gives precise color and full coverage for softer woods or hidden joins. A painted base with a stained top creates a polished contrast that reads intentional.
Sealing for indoor and outdoor durability
Pick finishes by use: wipe-on poly for a natural feel, water-based poly for quick dry and low odor, or oil-based for tough wear. For outdoor pieces, use spar varnish or an exterior epoxy and seal the feet and undersides to block moisture uptake.
Seal special surfaces properly: edge-seal contact paper with clear polyurethane, fully cure concrete before a penetrating sealer, and always use tempered glass for safety. Prep each surface: sand progressively, remove dust, and record products so future refresh coats match sheen and performance.
Tip: maintain the finish with coasters, gentle cleaners, and periodic touch-ups on high-contact legs and edges.
15 Beginner-Friendly DIY Coffee Tables You Can Build This Weekend: Materials, Safety, and U.S. Sourcing Tips
Local sourcing and safe selection help your coffee table project move smoothly from plan to finished surface. Pick stock that suits the final look and keeps costs low.
Where to find pallets, crates, and slabs locally
Look for pallets and crates at hardware stores, garden centers, community marketplaces, and local buy/sell groups. Choose clean, dry pieces with clear stamps and little damage.
Live-edge slabs arrive from sawmills or specialty lumber yards; ask for kiln-dried options to limit seasonal movement after assembly.
When to choose solid wood, plywood, or metal bases
Solid wood works best for tops and wear-prone edges for a warm, lasting look. Use quality plywood for hidden panels and shelves to save money without sacrificing strength.
Metal pipe bases suit modular builds and make disassembly simple when you move or store the piece.
Safety first: tempered glass, concrete cure times, and stable legs
Safety matters: always use tempered glass for a glass top. Let concrete cure fully in a melamine mold before sealing or lifting.
Confirm leg stability with levelers and even overhangs; seal feet for outdoor use with spar varnish or epoxy to protect the home surface and keep the furniture steady.
Quick step: size the coffee table at about 16–18 inches high and record the products used so future touch-ups match the original finish.
Conclusion
A simple plan and the right supplies make a noticeable center for any living space. You’ve seen approachable ideas—from pallet casters and hairpin legs to farmhouse warm tops and live-edge slabs—that turn a short project into a lasting coffee table.
Match style to space by picking a table that fits your living room scale, tools, and finish needs. Use spar varnish outdoors and a wipe-on poly inside to protect the look.
Source local pallets, slabs, or thrift pieces, pick stable legs, and plan steps around cure times. With basic tools and a clear plan, you’ll make a centerpiece that fits your home and impresses friends.